Once i got my head around the basics of Terraform I wanted to play with the vSphere provider to see what its was capable of. A basic use case that everyone needs is to deploy a VM. So my first use case is to deploy a VM from an OVA. The vSphere provider documentation for deploying an OVA uses William Lam’s nested ESXi OVA as an example. This is a great example of how to use the provider but seeing as I plan to play with the NSX-T provider also, I decided to use NSX-T Manager OVA as my source to deploy.
So first thing to do is setup your provider. Every provider in the Terraform registry has a Use Provider button on the provider page that pops up a How to use this provider box. This shows you what you need to put in your required_providers & provider block. In my case I will use a providers.tf file and it will look like the below example. Note you can only have one required_providers block in your configuration, but you can have multiple providers. So all required providers go in the same required_providers block and each provider has its own provider block.
# providers.tf

terraform {
  required_providers {
    vsphere = {
      source  = "hashicorp/vsphere"
      version = "2.1.1"
    }
  }
}
provider "vsphere" {
  user                 = var.vsphere_user
  password             = var.vsphere_password
  vsphere_server       = var.vsphere_server
  allow_unverified_ssl = true
}
To authenticate to our chosen provider (in this case vSphere) we need to provide credentials. If you read my initial post on Terraform you would have seen me mention a terraform.tfvars file which can be used for sensitive variables. We will declare these as variables later in the variables.tf file but this is where we assign the values. So my terraform.tfvars file looks like this
# terraform.tfvars

# vSphere Provider Credentials
vsphere_user     = "administrator@vsphere.local"
vsphere_password = "VMw@re1!"
Next we need variables to enable us to deploy our NSX-T Manager appliance. So we create a variables.tf file and populate it with our variables. Note – variables that have a default value are considered optional and the default value will be used if no value is passed.
# variables.tf

# vSphere Infrastructure Details
variable "data_center" { default = "sfo-m01-dc01" }
variable "cluster" { default = "sfo-m01-cl01" }
variable "vds" { default = "sfo-m01-vds01" }
variable "workload_datastore" { default = "vsanDatastore" }
variable "compute_pool" { default = "sfo-m01-cl01" }
variable "compute_host" {default = "sfo01-m01-esx01.sfo.rainpole.io"}
variable "vsphere_server" {default = "sfo-m01-vc01.sfo.rainpole.io"}

# vCenter Credential Variables
variable "vsphere_user" {}
variable "vsphere_password" {}

# NSX-T Manager Deployment
variable "mgmt_pg" { default = "sfo-m01-vds01-pg-mgmt" }
variable "vm_name" { default = "sfo-m01-nsx01a" }
variable "local_ovf_path" { default = "F:\\OVAs\\nsx-unified-appliance-3.1.3.5.0.19068437.ova" }
variable "deployment_option" { default = "extra_small" } # valid deployments are: extra_small, small, medium, large
variable "nsx_role" { default = "NSX Manager" } # valid roles are NSX Manager, NSX Global Manager
variable "nsx_ip_0" { default = "172.16.225.66" }
variable "nsx_netmask_0" { default = "255.255.255.0" }
variable "nsx_gateway_0" { default = "172.16.225.1" }
variable "nsx_dns1_0" { default = "172.16.225.4" }
variable "nsx_domain_0" { default = "sfo.rainpole.io" }
variable "nsx_ntp_0" { default = "ntp.sfo.rainpole.io" }
variable "nsx_isSSHEnabled" { default = "True" }
variable "nsx_allowSSHRootLogin" { default = "True" }
variable "nsx_passwd_0" { default = "VMw@re1!VMw@re1!" }
variable "nsx_cli_passwd_0" { default = "VMw@re1!VMw@re1!" }
variable "nsx_cli_audit_passwd_0" { default = "VMw@re1!VMw@re1!" }
variable "nsx_hostname" { default = "sfo-m01-nsx01a.sfo.rainpole.io" }
Now that we have our provider & variables in place we need a plan file to deploy the NSX-T Manager OVA, including the data sources we need to pull information from and the resource we are going to create.
<br />
# main.tf</p>
<p># Data source for vCenter Datacenter<br />
data "vsphere_datacenter" "datacenter" {<br />
  name = var.data_center<br />
}</p>
<p># Data source for vCenter Cluster<br />
data "vsphere_compute_cluster" "cluster" {<br />
  name          = var.cluster<br />
  datacenter_id = data.vsphere_datacenter.datacenter.id<br />
}</p>
<p># Data source for vCenter Datastore<br />
data "vsphere_datastore" "datastore" {<br />
  name          = var.workload_datastore<br />
  datacenter_id = data.vsphere_datacenter.datacenter.id<br />
}</p>
<p># Data source for vCenter Portgroup<br />
data "vsphere_network" "mgmt" {<br />
  name          = var.mgmt_pg<br />
  datacenter_id = data.vsphere_datacenter.datacenter.id<br />
}</p>
<p># Data source for vCenter Resource Pool. In our case we will use the root resource pool<br />
data "vsphere_resource_pool" "pool" {<br />
  name          = format("%s%s", data.vsphere_compute_cluster.cluster.name, "/Resources")<br />
  datacenter_id = data.vsphere_datacenter.datacenter.id<br />
}</p>
<p># Data source for ESXi host to deploy to<br />
data "vsphere_host" "host" {<br />
  name          = var.compute_host<br />
  datacenter_id = data.vsphere_datacenter.datacenter.id<br />
}</p>
<p># Data source for the OVF to read the required OVF Properties<br />
data "vsphere_ovf_vm_template" "ovfLocal" {<br />
  name             = var.vm_name<br />
  resource_pool_id = data.vsphere_resource_pool.pool.id<br />
  datastore_id     = data.vsphere_datastore.datastore.id<br />
  host_system_id   = data.vsphere_host.host.id<br />
  local_ovf_path   = var.local_ovf_path<br />
  ovf_network_map = {<br />
    "Network 1" = data.vsphere_network.mgmt.id<br />
  }<br />
}</p>
<p># Deployment of VM from Local OVA<br />
resource "vsphere_virtual_machine" "nsxt01" {<br />
  name                 = var.vm_name<br />
  datacenter_id        = data.vsphere_datacenter.datacenter.id<br />
  datastore_id         = data.vsphere_ovf_vm_template.ovfLocal.datastore_id<br />
  host_system_id       = data.vsphere_ovf_vm_template.ovfLocal.host_system_id<br />
  resource_pool_id     = data.vsphere_ovf_vm_template.ovfLocal.resource_pool_id<br />
  num_cpus             = data.vsphere_ovf_vm_template.ovfLocal.num_cpus<br />
  num_cores_per_socket = data.vsphere_ovf_vm_template.ovfLocal.num_cores_per_socket<br />
  memory               = data.vsphere_ovf_vm_template.ovfLocal.memory<br />
  guest_id             = data.vsphere_ovf_vm_template.ovfLocal.guest_id<br />
  scsi_type            = data.vsphere_ovf_vm_template.ovfLocal.scsi_type<br />
  dynamic "network_interface" {<br />
    for_each = data.vsphere_ovf_vm_template.ovfLocal.ovf_network_map<br />
    content {<br />
      network_id = network_interface.value<br />
    }<br />
  }</p>
<p>  wait_for_guest_net_timeout = 5</p>
<p>  ovf_deploy {<br />
    allow_unverified_ssl_cert = true<br />
    local_ovf_path            = var.local_ovf_path<br />
    disk_provisioning         = "thin"<br />
    deployment_option         = var.deployment_option</p>
<p>  }<br />
  vapp {<br />
    properties = {<br />
      "nsx_role"               = var.nsx_role,<br />
      "nsx_ip_0"               = var.nsx_ip_0,<br />
      "nsx_netmask_0"          = var.nsx_netmask_0,<br />
      "nsx_gateway_0"          = var.nsx_gateway_0,<br />
      "nsx_dns1_0"             = var.nsx_dns1_0,<br />
      "nsx_domain_0"           = var.nsx_domain_0,<br />
      "nsx_ntp_0"              = var.nsx_ntp_0,<br />
      "nsx_isSSHEnabled"       = var.nsx_isSSHEnabled,<br />
      "nsx_allowSSHRootLogin"  = var.nsx_allowSSHRootLogin,<br />
      "nsx_passwd_0"           = var.nsx_passwd_0,<br />
      "nsx_cli_passwd_0"       = var.nsx_cli_passwd_0,<br />
      "nsx_cli_audit_passwd_0" = var.nsx_cli_audit_passwd_0,<br />
      "nsx_hostname"           = var.nsx_hostname<br />
    }<br />
  }<br />
  lifecycle {<br />
    ignore_changes = [<br />
      #vapp # Enable this to ignore all vapp properties if the plan is re-run<br />
      vapp[0].properties["nsx_role"], # Avoid unwanted changes to specific vApp properties.<br />
      vapp[0].properties["nsx_passwd_0"],<br />
      vapp[0].properties["nsx_cli_passwd_0"],<br />
      vapp[0].properties["nsx_cli_audit_passwd_0"],<br />
      host_system_id # Avoids moving the VM back to the host it was deployed to if DRS has relocated it<br />
    ]<br />
  }<br />
}<br />
Once we have all of the above we can run the following to validate our plan
terraform plan -out=nsxt01If your plan is successful you should see an output similar to below

Once your plan is successful run the command below to apply the plan
terraform apply nsxt01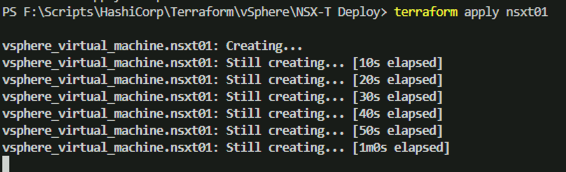
If the stars align your NSX-T Manager appliance should deploy successfully. Once its deployed, if you were to re-run the plan you should see a message similar to below

One of the key pieces to this is the lifecycle block in the plan. The lifecycle block enables you to callout things that Terraform should ignore when it is re-applying a plan. Things like tags or other items that may get updated by other systems etc. In our case we want Terraform to ignore the vApp properties as it will try to apply password properties every time, which would entail powering down the VM, making the change, and powering the VM back on.

Leave a comment