The next step in the upgrade sequence is to upgrade the vSphere cluster to 9.0.
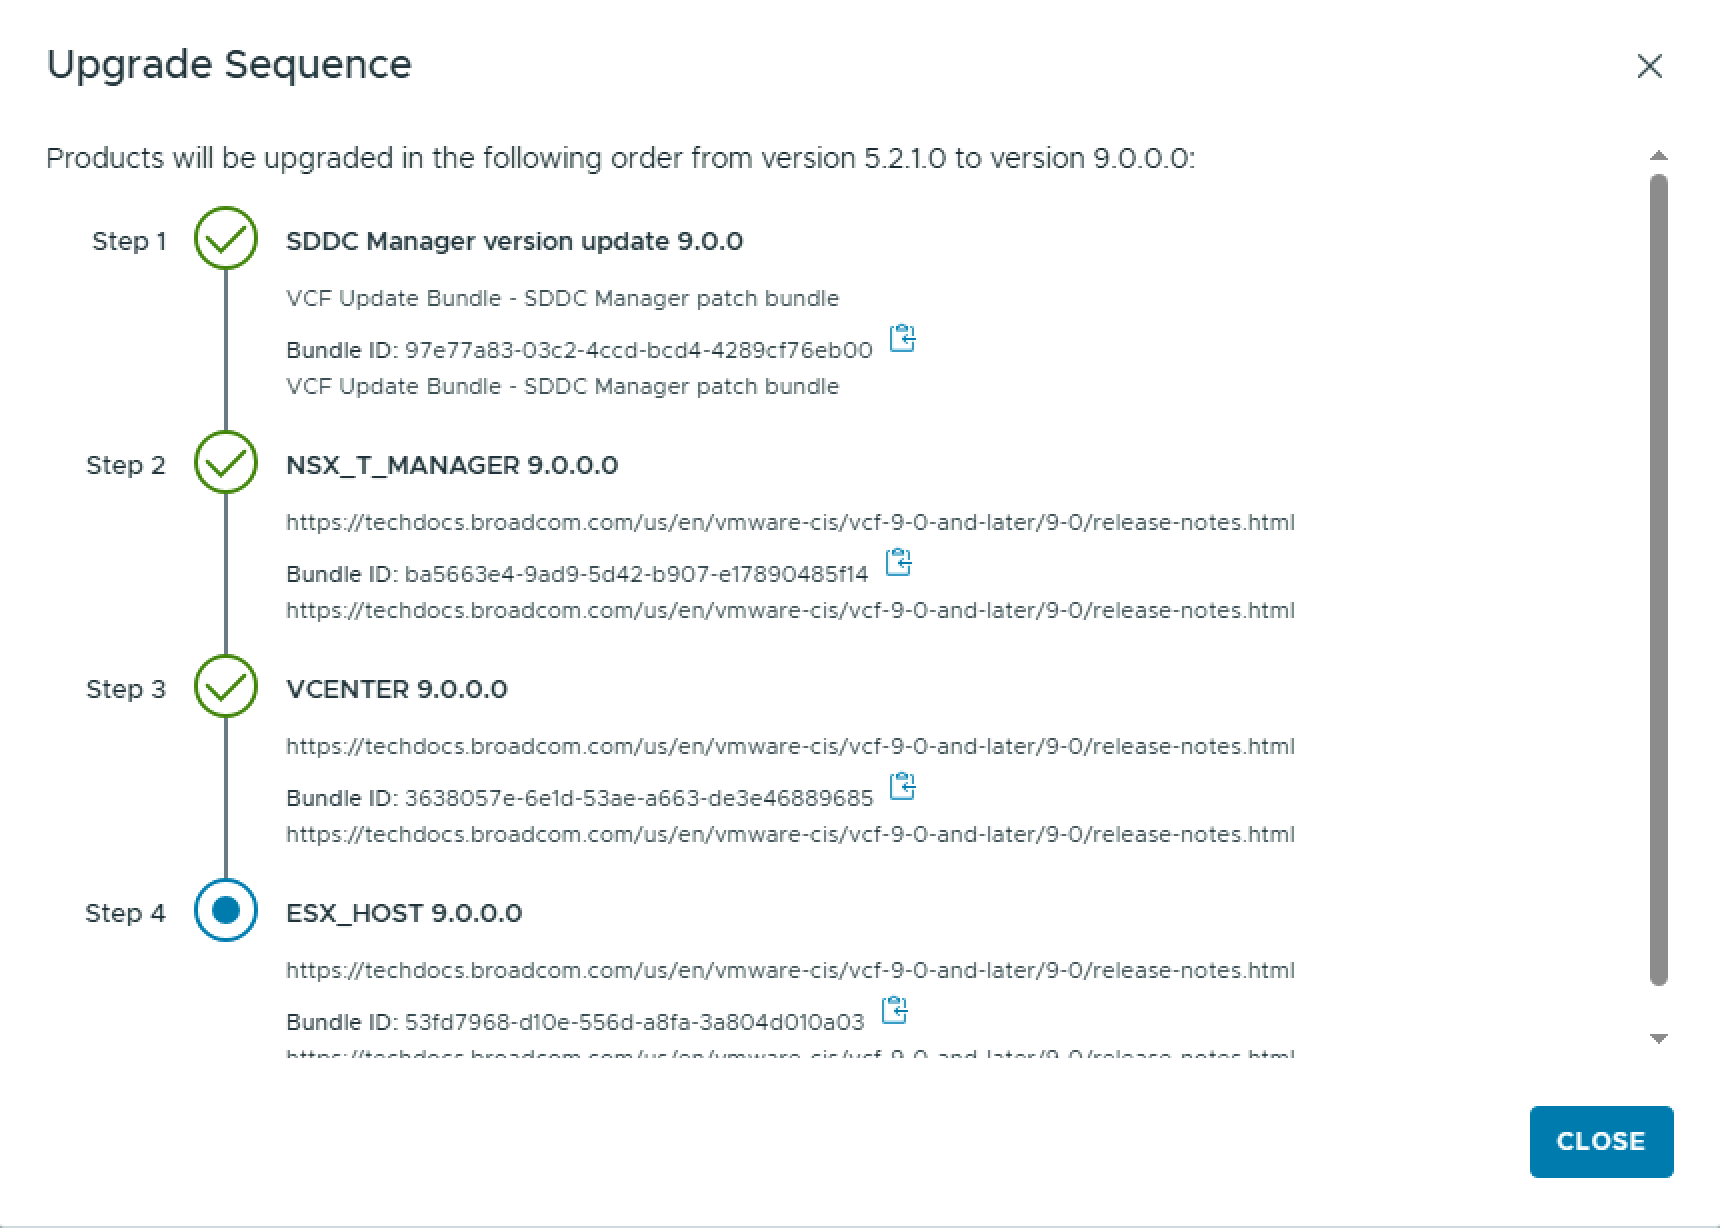
Because the cluster is now managed by vLCM images, you need a vLCM image matching the target version you wish to upgrade to.
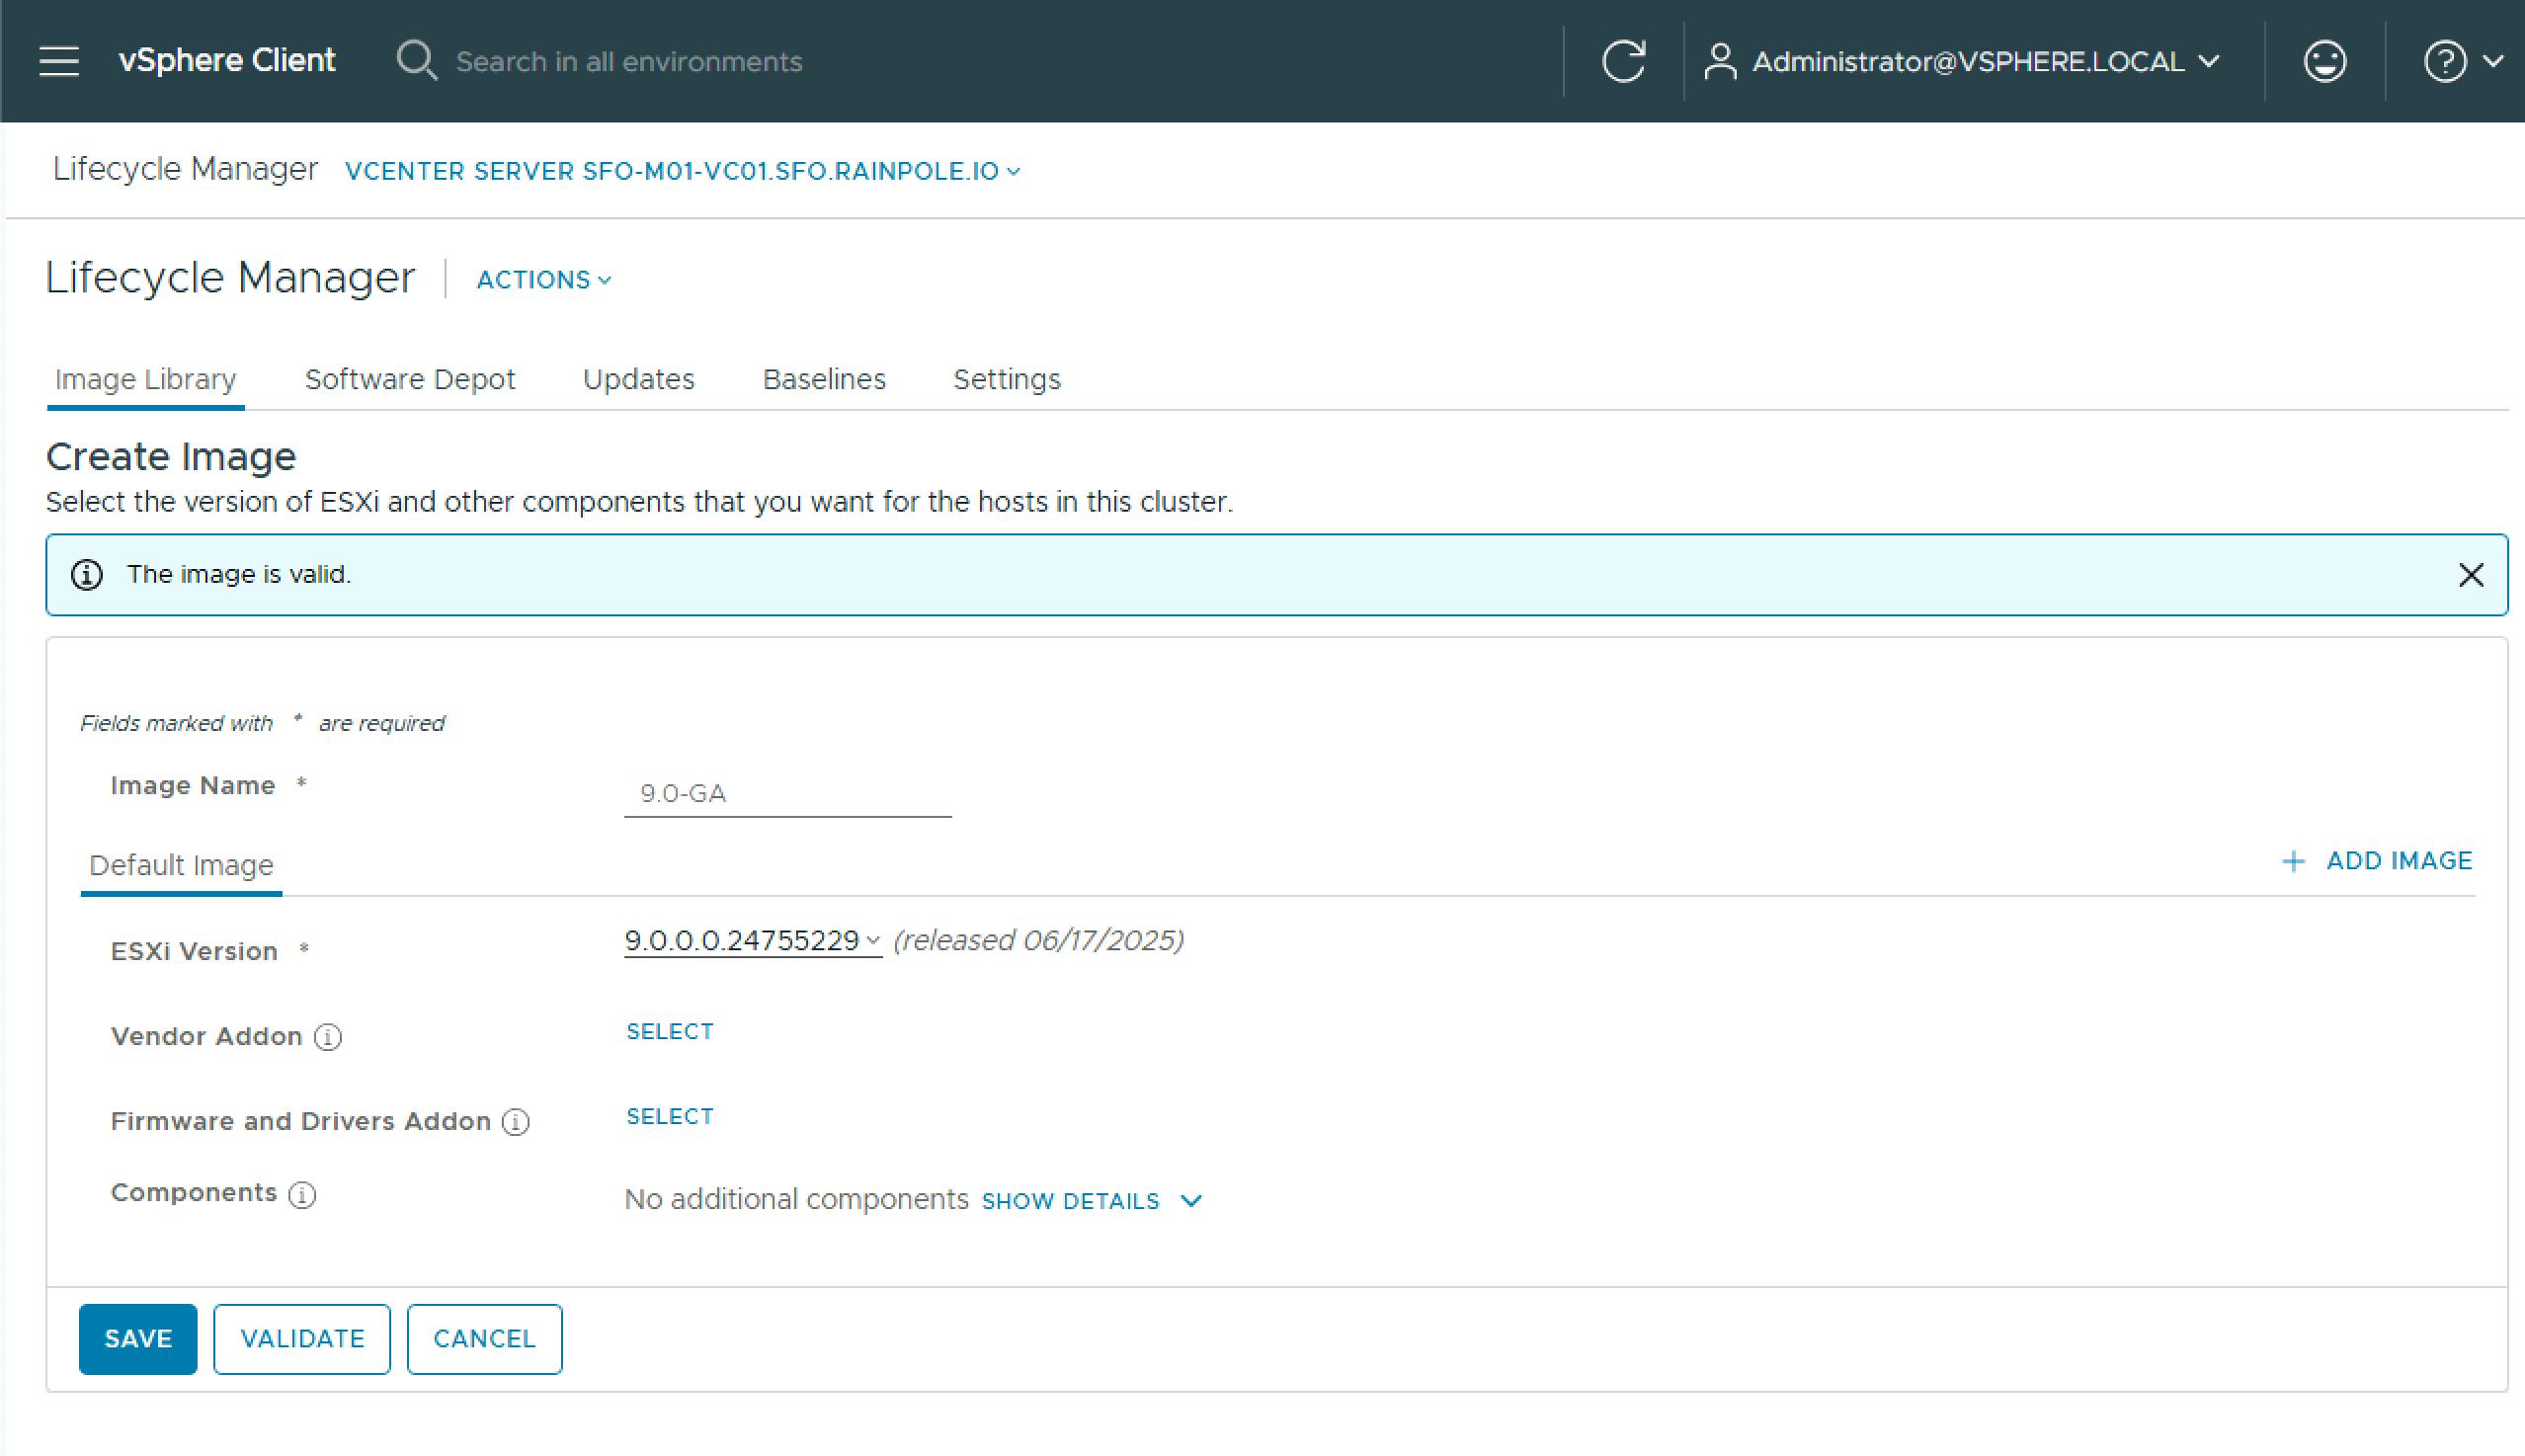
- Log into the vSphere client and navigate to Menu > Lifecycle Manager, and click Create Image.
- Give the image a name and select the correct target ESX version. Add any vendor/firmware/drivers you need and click Validate, and then Save.
To import the image to SDDC Manager, navigate to Lifecycle Management > Image Management and click Import Image.
- Select the vCenter, select the image, and click Import.

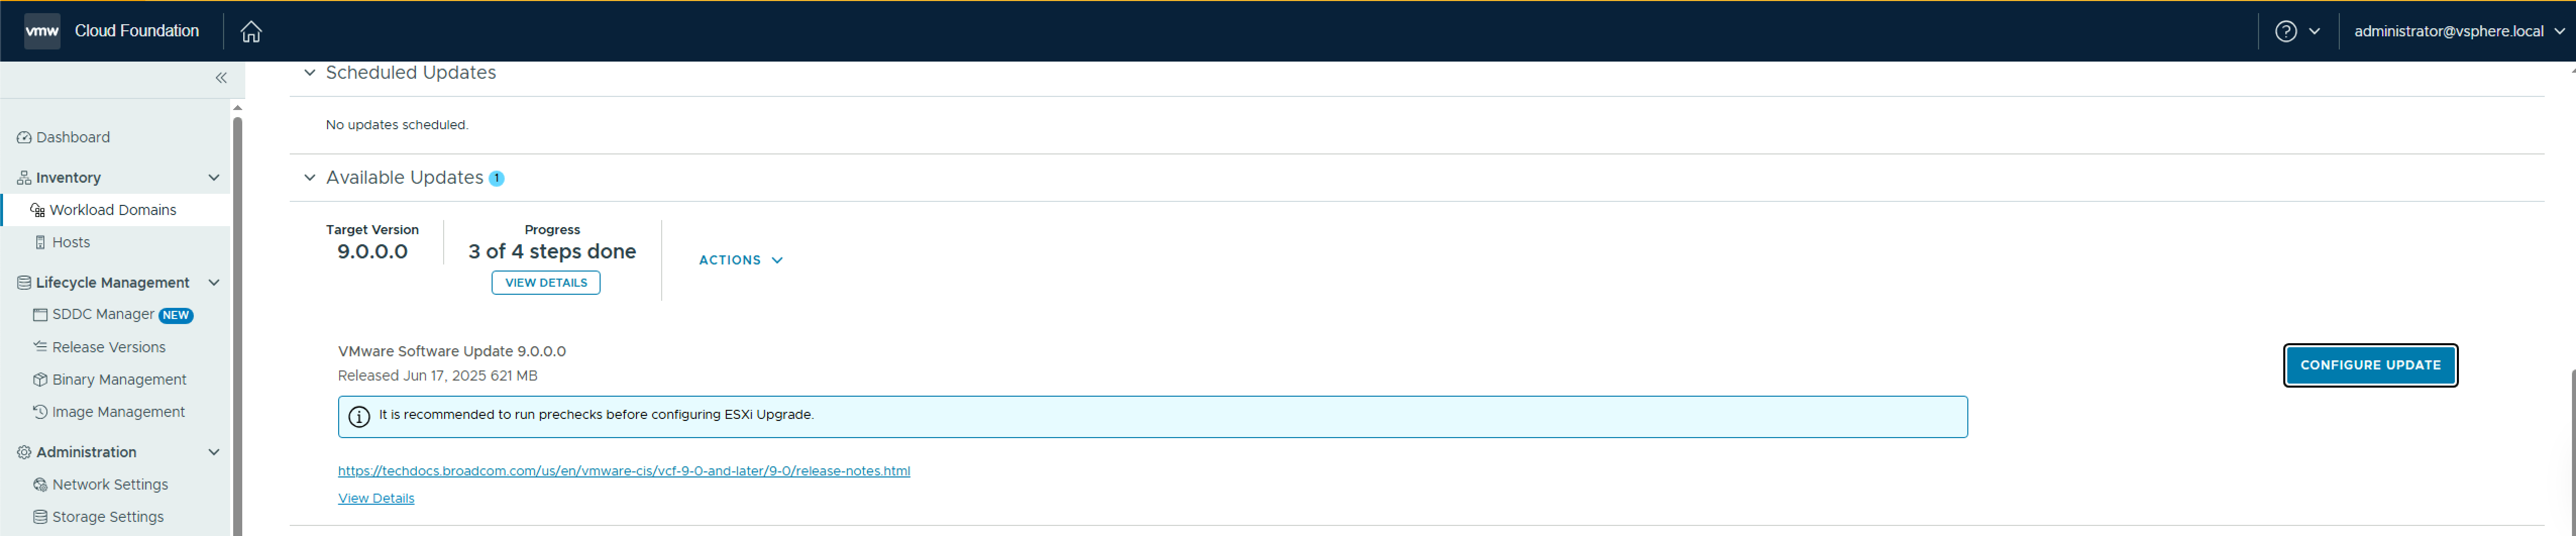
Once the vLCM image is imported, navigate to Workload Domains > Management Workload Domain > Updates, and click Run Precheck and ensure all prechecks pass.
Once the pre-check passes, click Configure Update.
On the Introduction pane, review the details and click Next.

On the Select Clusters with Images pane, select the clusters to be upgraded, and click Next.

On the Assign Images pane, select the cluster, and click Assign Image.

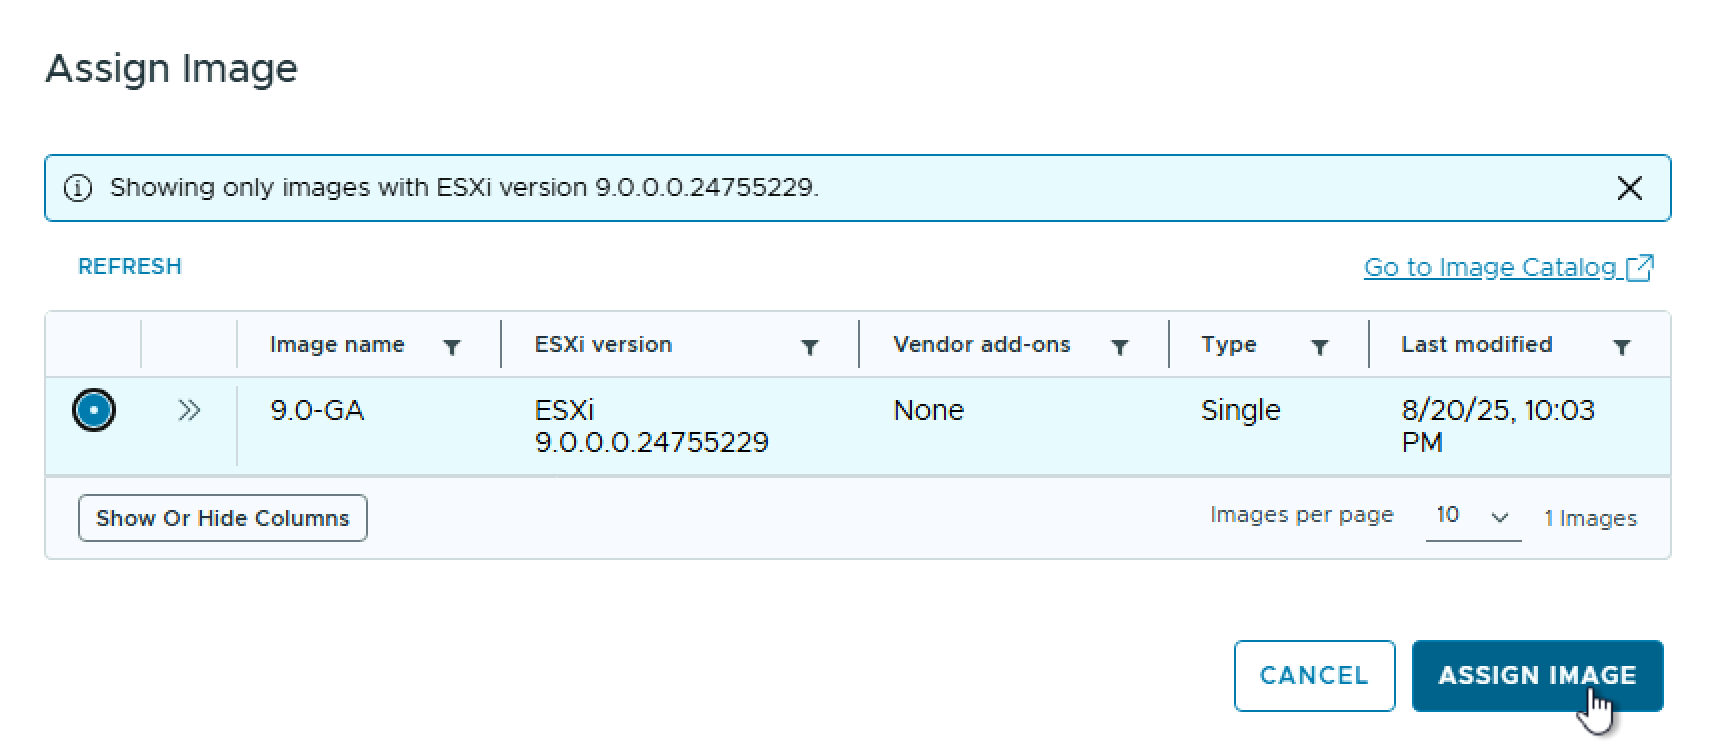
On the Assign Image pane, select the desired image and click Assign Image, and click Next when returned to the Assign Images pane.
On the Upgrade Options pane, select the options you want and click Next.

On the Review pane, review the chosen options and click Run Precheck.

The vSphere cluster upgrade pre-check begins.

Once the pre-check completes, click Schedule Update.
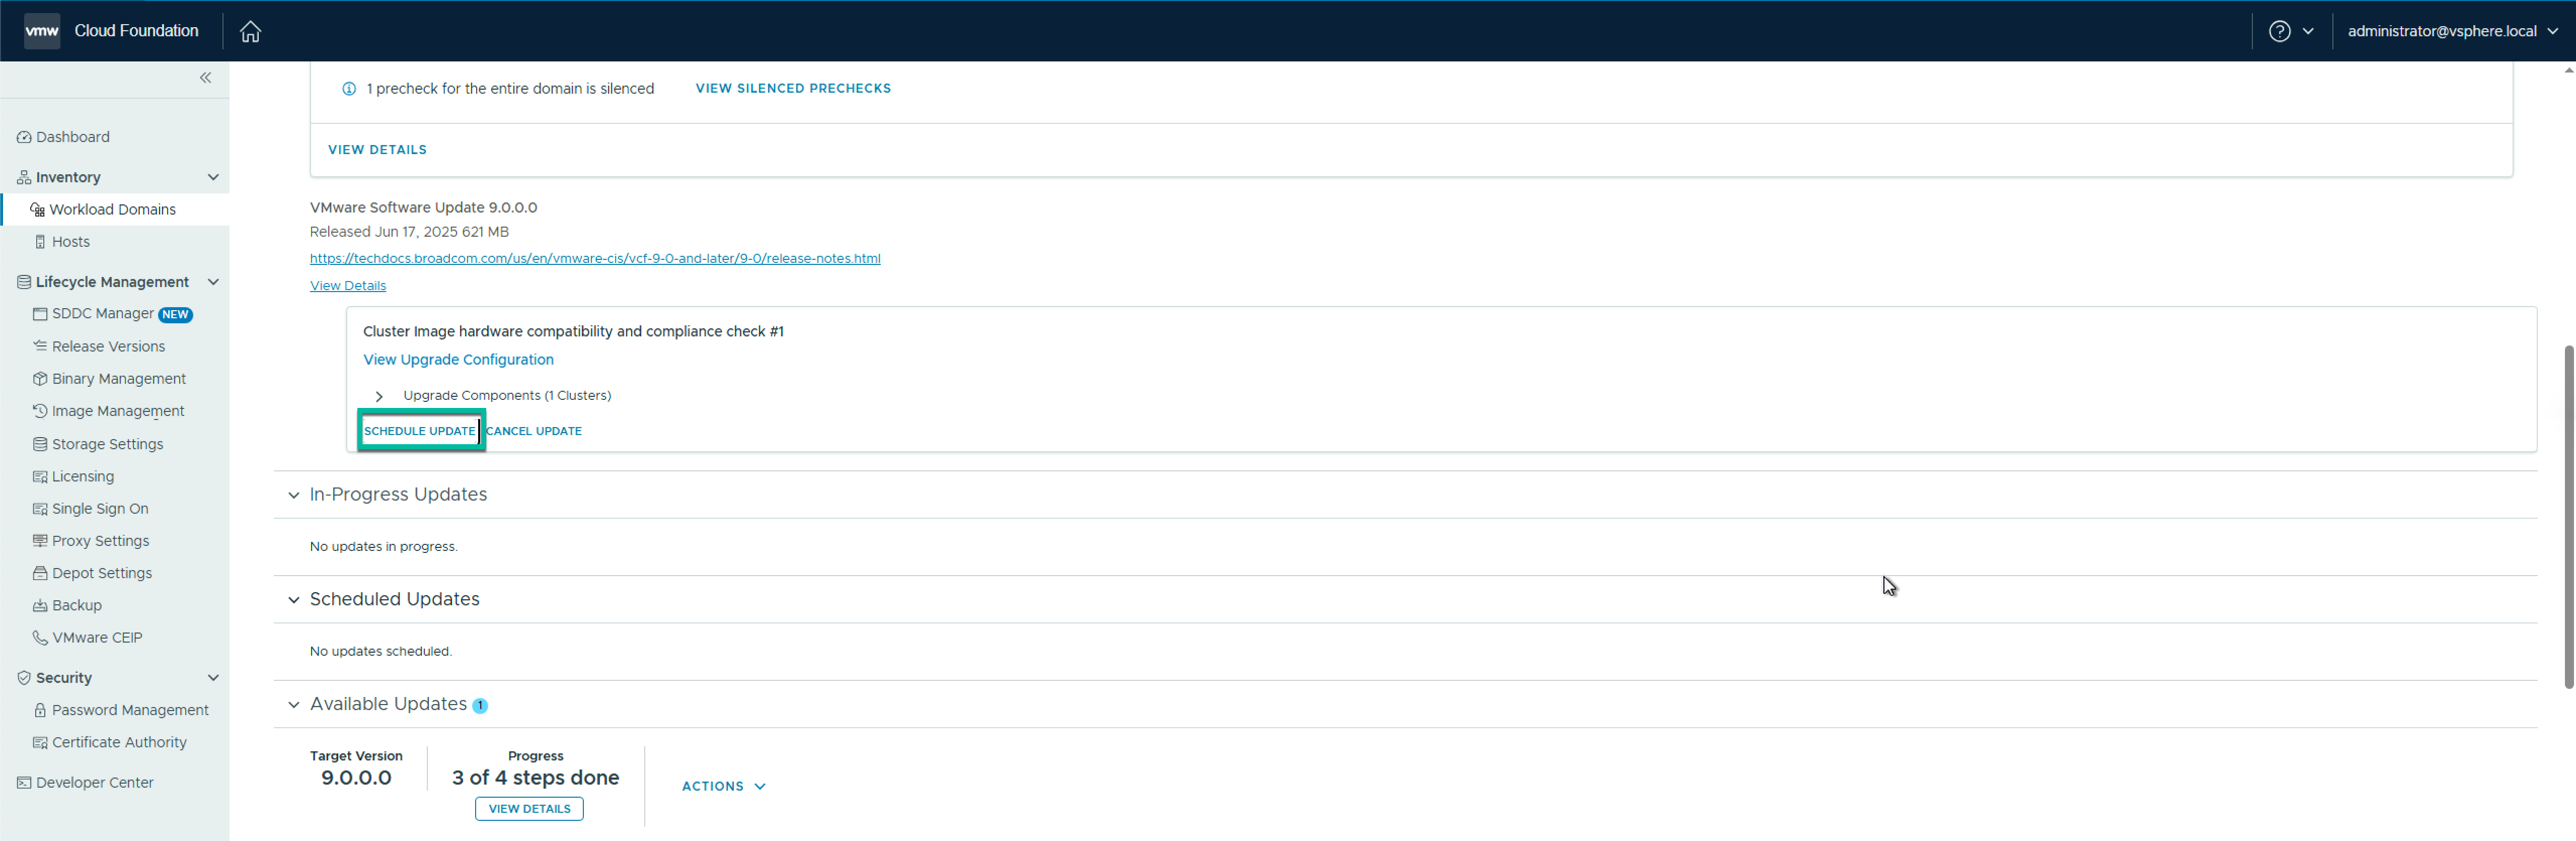
On the review pane, review the settings and click Next.

On the Schedule Update pane, select your Maintenance Window, and click I have reviewed the hardware compatibility and compliance check result and have verified the clusters images are safe to apply, and click Finish.

The vSphere cluster upgrade begins
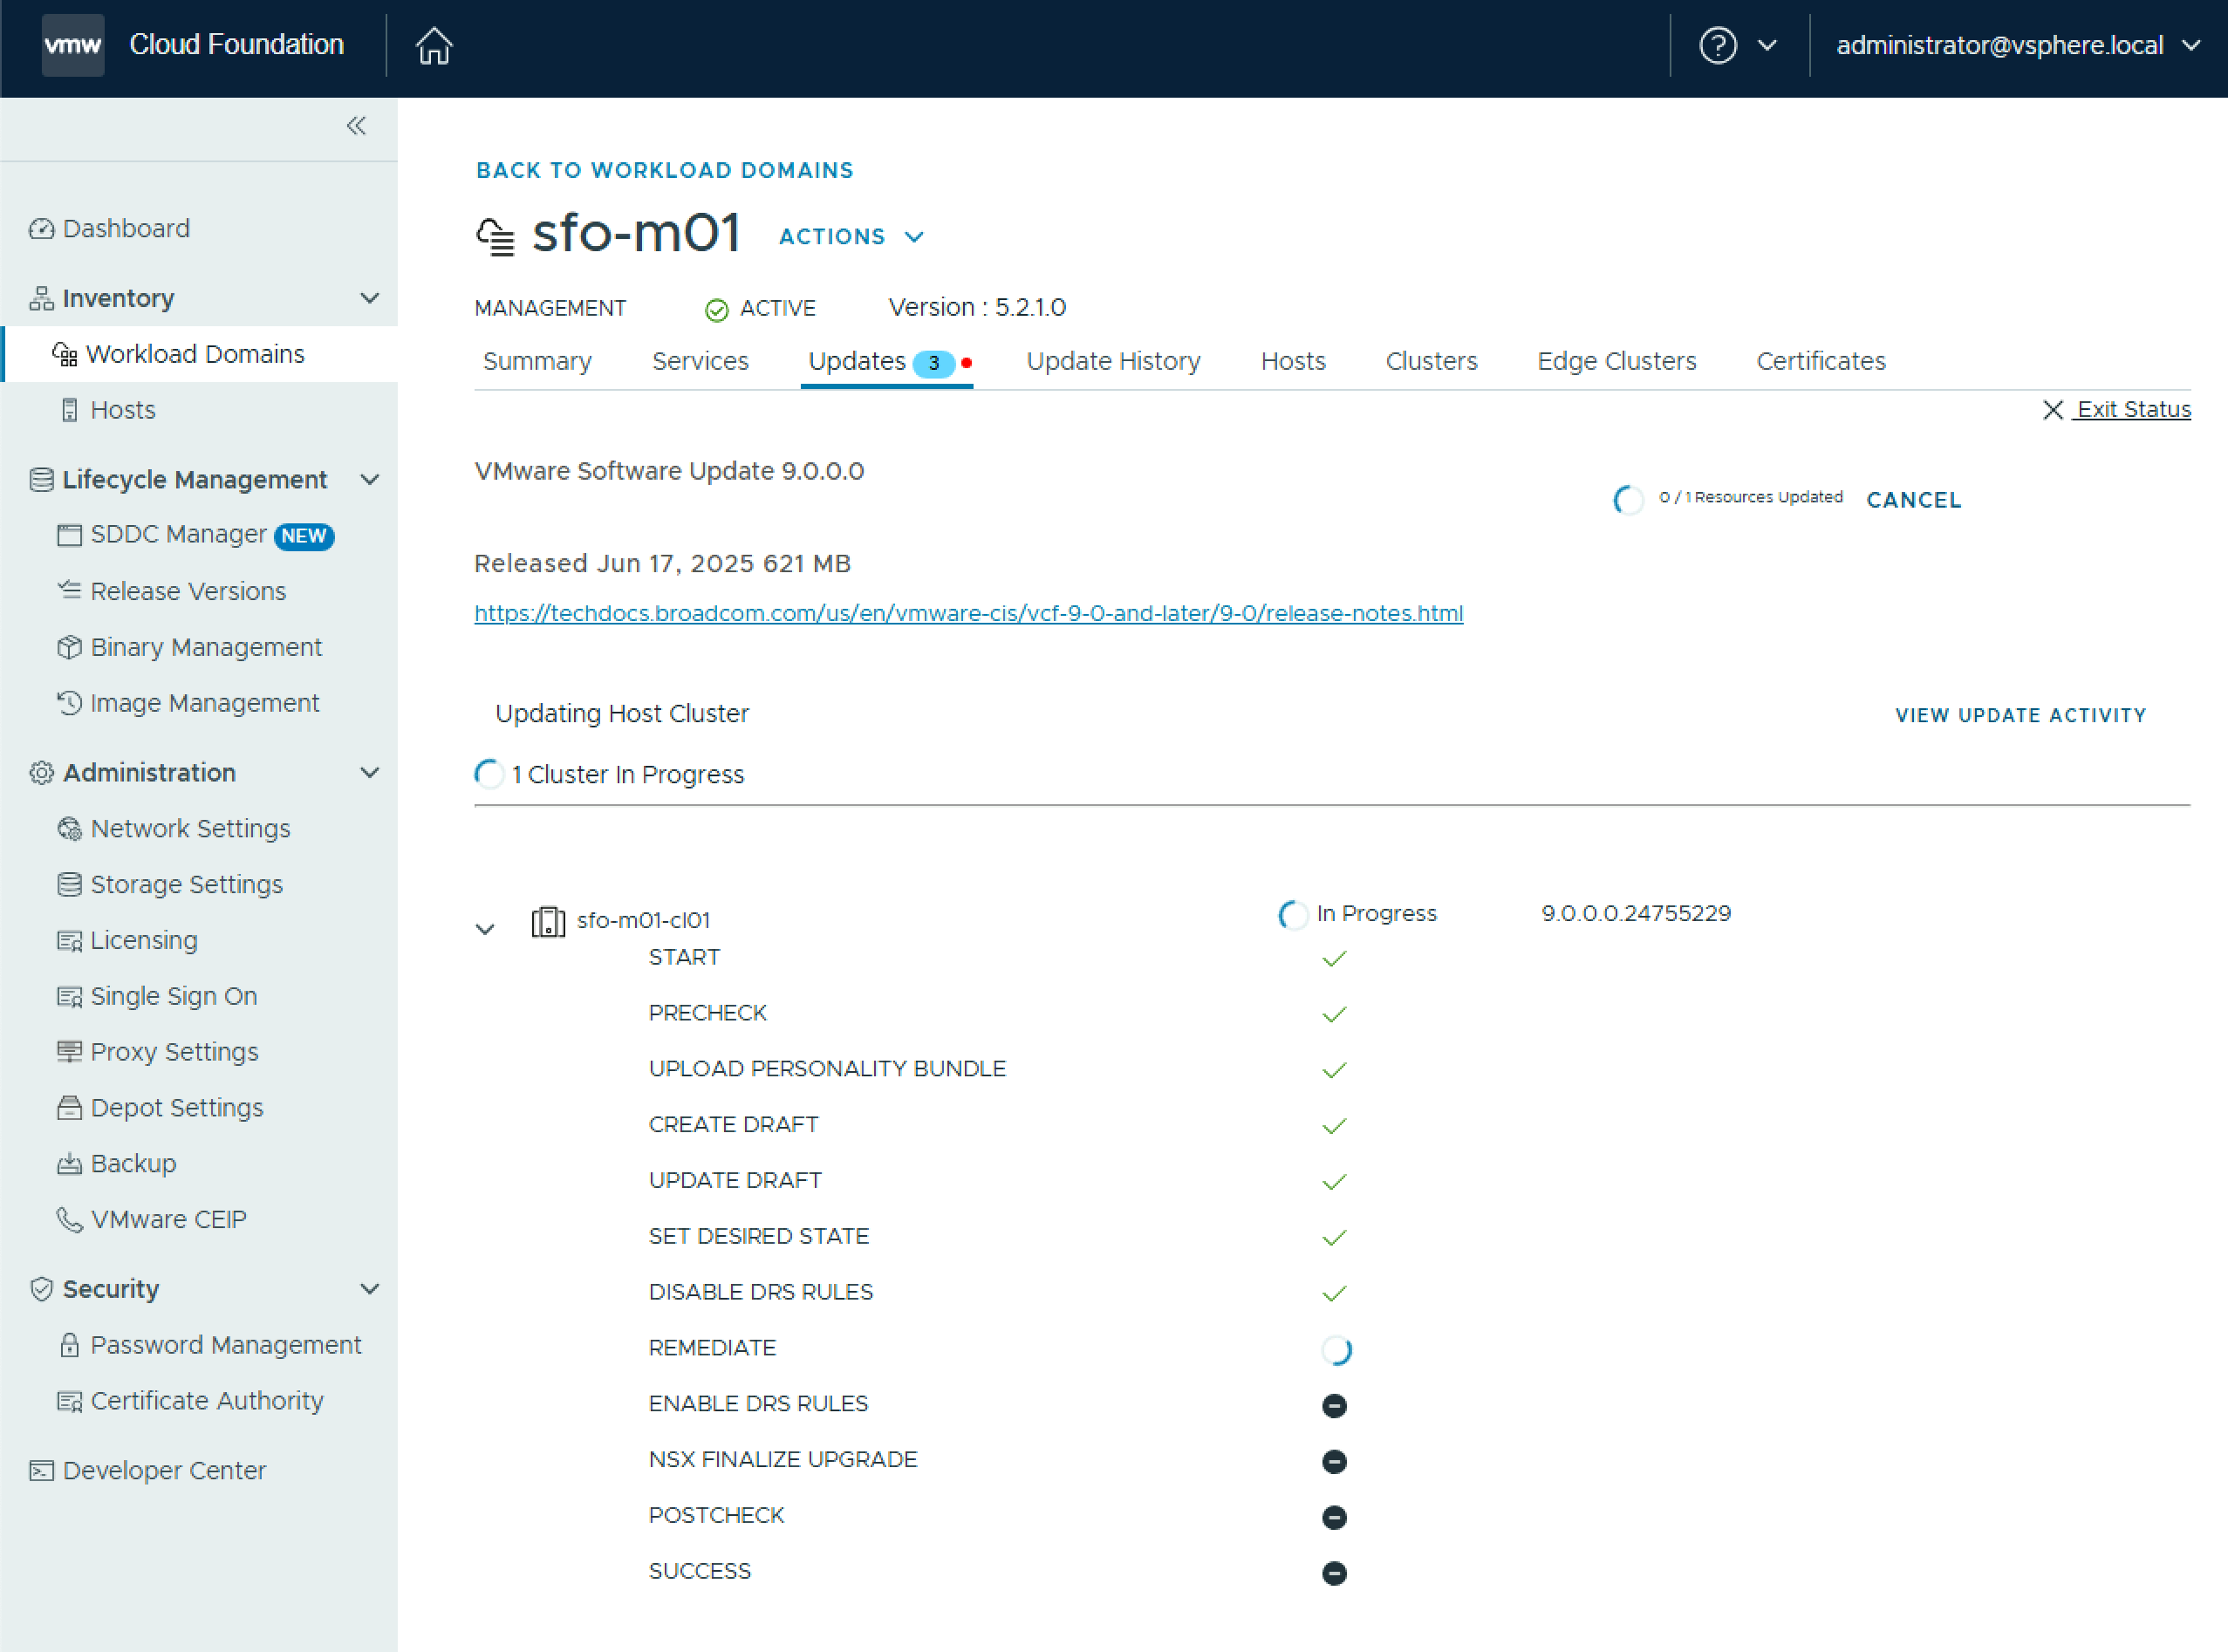
Once the upgrade completes, you can move on to the next steps.


