HashiCorp Terraform is not currently available on the Photon OS repository. If you would like to install Terraform on a PhotonOS appliance you can use the script below. Note: The versions for Go and Terraform that I have included are current at the time of writing. Thanks to my colleague Ryan Johnson who shared this method with me some time ago for another project.
#!/usr/bin/env bash

# Versions
GO_VERSION="1.21.4"
TERRAFORM_VERSION="1.6.3"

# Arch
if [[ $(uname -m) == "x86_64" ]]; then
  LINUX_ARCH="amd64"
elif [[ $(uname -m) == "aarch64" ]]; then
  LINUX_ARCH="arm64"
fi

# Directory
if ! [[ -d ~/code ]]; then
  mkdir ~/code
fi

# Go
wget -q -O go${GO_VERSION}.linux-${LINUX_ARCH}.tar.gz https://golang.org/dl/go${GO_VERSION}.linux-${LINUX_ARCH}.tar.gz
tar -C /usr/local -xzf go${GO_VERSION}.linux-${LINUX_ARCH}.tar.gz
PATH=$PATH:/usr/local/go/bin
go version
rm go${GO_VERSION}.linux-${LINUX_ARCH}.tar.gz
export GOPATH=${HOME}/code/go

# HashiCorp
wget -q https://releases.hashicorp.com/terraform/${TERRAFORM_VERSION}/terraform_${TERRAFORM_VERSION}_linux_${LINUX_ARCH}.zip
unzip -o -d /usr/local/bin/ terraform_${TERRAFORM_VERSION}_linux_${LINUX_ARCH}.zip
rm ./*.zip
I have been working a lot with Terraform lately and in particular the Terraform Provider For VMware Cloud Foundation. As I covered previously, the provider is something that is in development but is available to be tested and used in your VMware Cloud Foundation instances.
I spent this week at VMware Explore in Barcelona and have been talking with our customers about their automation journey and what tools they are using for configuration management. Terraform came up in almost all conversations and the topic of Terraform modules specifically. Terraform modules are basically a set of standard configuration files that can be used for consistent, repeatable deployments. In an effort to standardise my VI Workload domain deployments, and to learn more about Terraform modules, I have created a Terraform module for VMware Cloud Foundation VI Workload domains.
The module is available on GitHub here and is also published to the Terraform registry here. Below is an example of using the module to deploy a VI Workload domain on a VMware Cloud Foundation 4.5.2 instance. Because the module contains all the logic for variable types etc, all you need to do is pass variable values.
Once you have the above defined, you simply need to run the usual Terraform commands to apply the configuration. First we initialise the env which will pull the required module version
terraform init
Then create the and apply the plan
terraform plan -out=create-vi-wld
terraform apply create-vi-wld
As part of my series on deploying and managing VMware Cloud Foundation using Terraform, this post will focus on deploying the VMware Cloud Foundation Cloud Builder appliance using the vSphere Terraform provider. I’ve used this provider in the past to deploy the NSX Manager appliance.
Check out the other posts on Terraform with VMware Cloud Foundation here:
Note the vCenter Server credentials in the above variables.tf do not have default values. We will declare these sensitive values in a terraform.tfvars file and add *.tfvars to our .GitIgnore file so they are not synced to our Git repo.
Now that we have all of our variables defined we can define our main.tf to perform the deployment. As part of this, we first need to gather some data from the target vCenter Server, so we know where to deploy the appliance.
# main.tf
# Data source for vCenter Datacenter
data "vsphere_datacenter" "datacenter" {
name = var.data_center
}
# Data source for vCenter Cluster
data "vsphere_compute_cluster" "cluster" {
name = var.cluster
datacenter_id = data.vsphere_datacenter.datacenter.id
}
# Data source for vCenter Datastore
data "vsphere_datastore" "datastore" {
name = var.datastore
datacenter_id = data.vsphere_datacenter.datacenter.id
}
# Data source for vCenter Portgroup
data "vsphere_network" "mgmt" {
name = var.mgmt_pg
datacenter_id = data.vsphere_datacenter.datacenter.id
}
# Data source for vCenter Resource Pool. In our case we will use the root resource pool
data "vsphere_resource_pool" "pool" {
name = format("%s%s", data.vsphere_compute_cluster.cluster.name, "/Resources")
datacenter_id = data.vsphere_datacenter.datacenter.id
}
# Data source for ESXi host to deploy to
data "vsphere_host" "host" {
name = var.compute_host
datacenter_id = data.vsphere_datacenter.datacenter.id
}
# Data source for the OVF to read the required OVF Properties
data "vsphere_ovf_vm_template" "ovfLocal" {
name = var.vm_name
resource_pool_id = data.vsphere_resource_pool.pool.id
datastore_id = data.vsphere_datastore.datastore.id
host_system_id = data.vsphere_host.host.id
local_ovf_path = var.local_ovf_path
ovf_network_map = {
"Network 1" = data.vsphere_network.mgmt.id
}
}
# Deployment of VM from Local OVA
resource "vsphere_virtual_machine" "cb01" {
name = var.vm_name
datacenter_id = data.vsphere_datacenter.datacenter.id
datastore_id = data.vsphere_ovf_vm_template.ovfLocal.datastore_id
host_system_id = data.vsphere_ovf_vm_template.ovfLocal.host_system_id
resource_pool_id = data.vsphere_ovf_vm_template.ovfLocal.resource_pool_id
num_cpus = data.vsphere_ovf_vm_template.ovfLocal.num_cpus
num_cores_per_socket = data.vsphere_ovf_vm_template.ovfLocal.num_cores_per_socket
memory = data.vsphere_ovf_vm_template.ovfLocal.memory
guest_id = data.vsphere_ovf_vm_template.ovfLocal.guest_id
scsi_type = data.vsphere_ovf_vm_template.ovfLocal.scsi_type
wait_for_guest_net_timeout = 5
ovf_deploy {
allow_unverified_ssl_cert = true
local_ovf_path = var.local_ovf_path
disk_provisioning = "thin"
ovf_network_map = data.vsphere_ovf_vm_template.ovfLocal.ovf_network_map
}
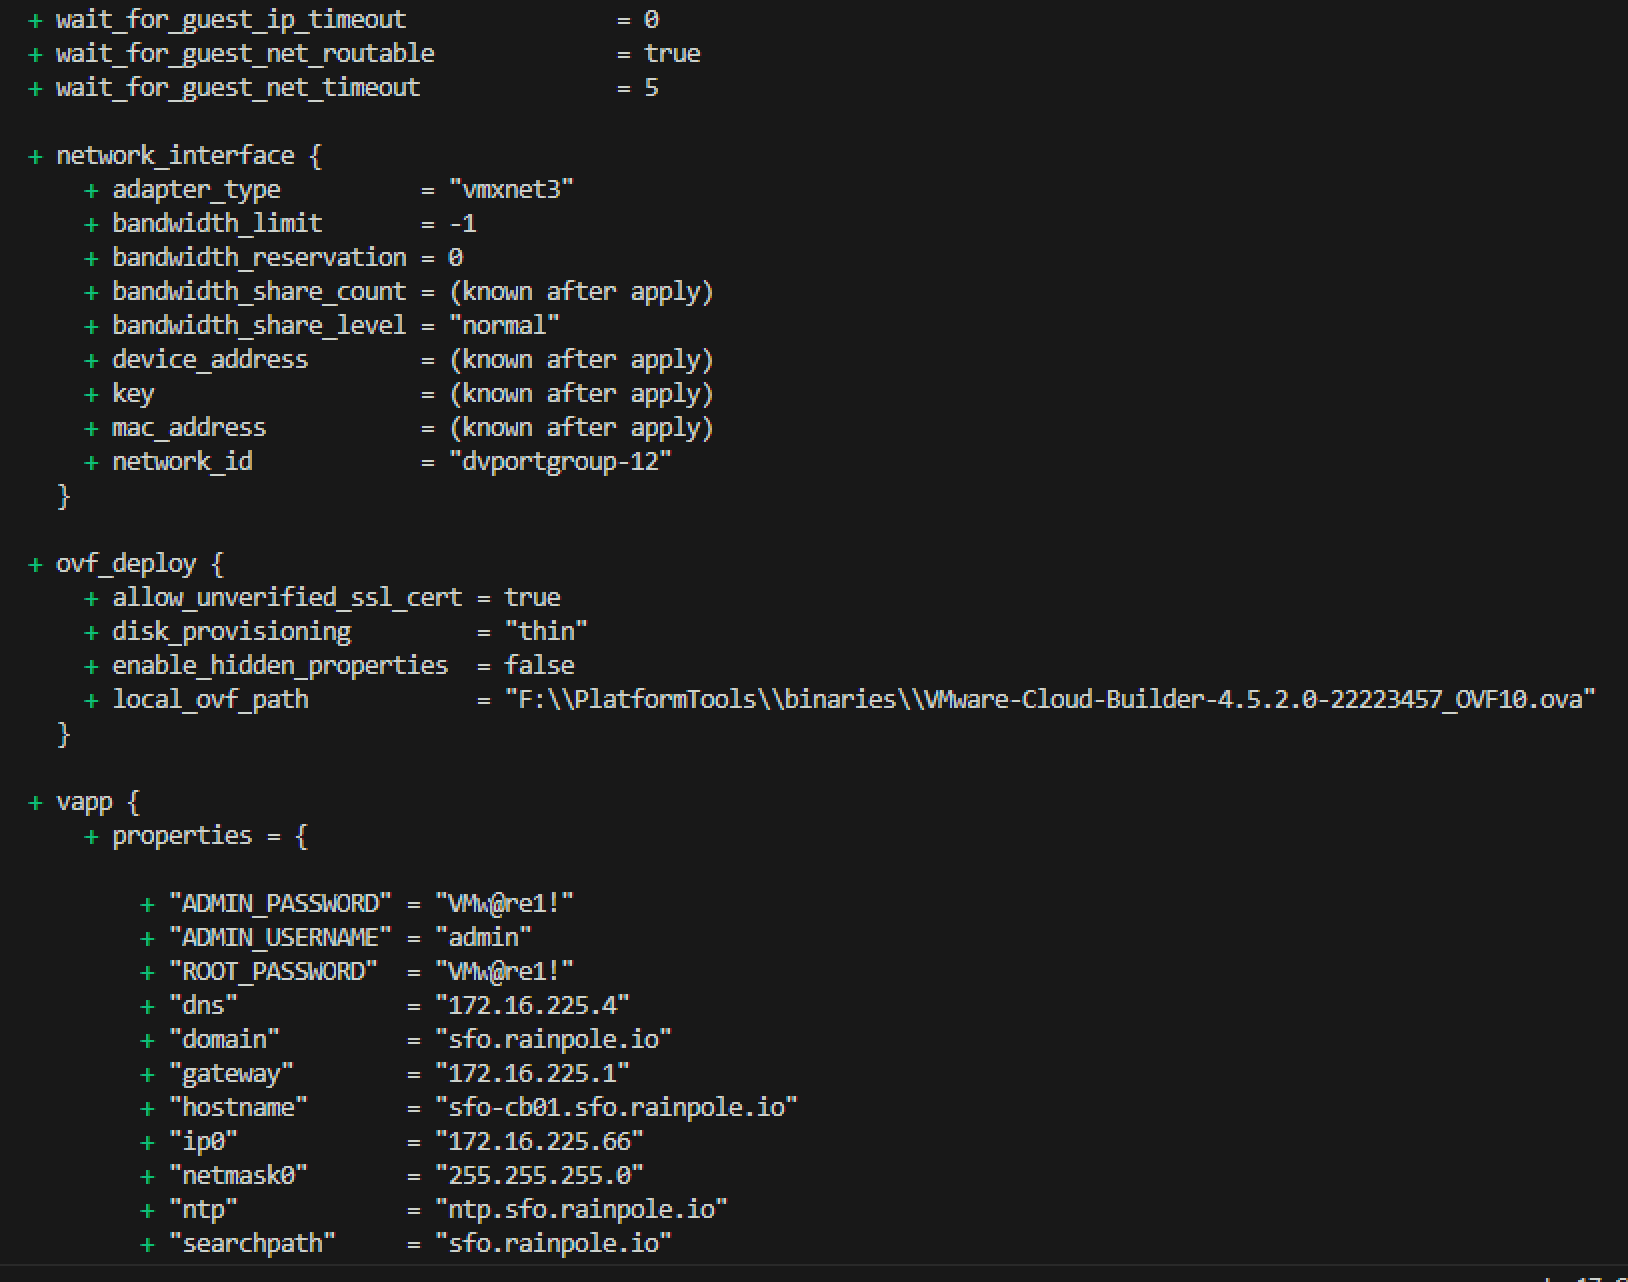
vapp {
properties = {
"ip0" = var.ip0,
"netmask0" = var.netmask0,
"gateway" = var.gateway,
"dns" = var.dns,
"domain" = var.domain,
"ntp" = var.ntp,
"searchpath" = var.searchpath,
"ADMIN_USERNAME" = "admin",
"ADMIN_PASSWORD" = var.ADMIN_PASSWORD,
"ROOT_PASSWORD" = var.ROOT_PASSWORD,
"hostname" = var.hostname
}
}
lifecycle {
ignore_changes = [
#vapp # Enable this to ignore all vapp properties if the plan is re-run
vapp[0].properties["ADMIN_PASSWORD"],
vapp[0].properties["ROOT_PASSWORD"],
host_system_id # Avoids moving the VM back to the host it was deployed to if DRS has relocated it
]
}
}
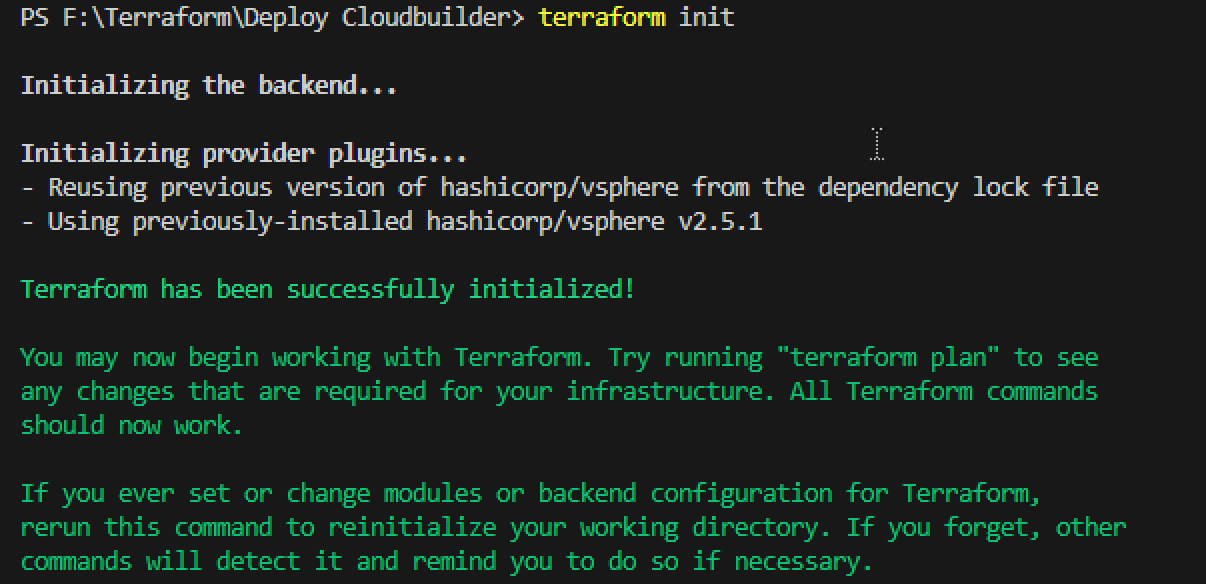
Now we can run the following to initialise Terraform and the required vSphere provider
terraform init
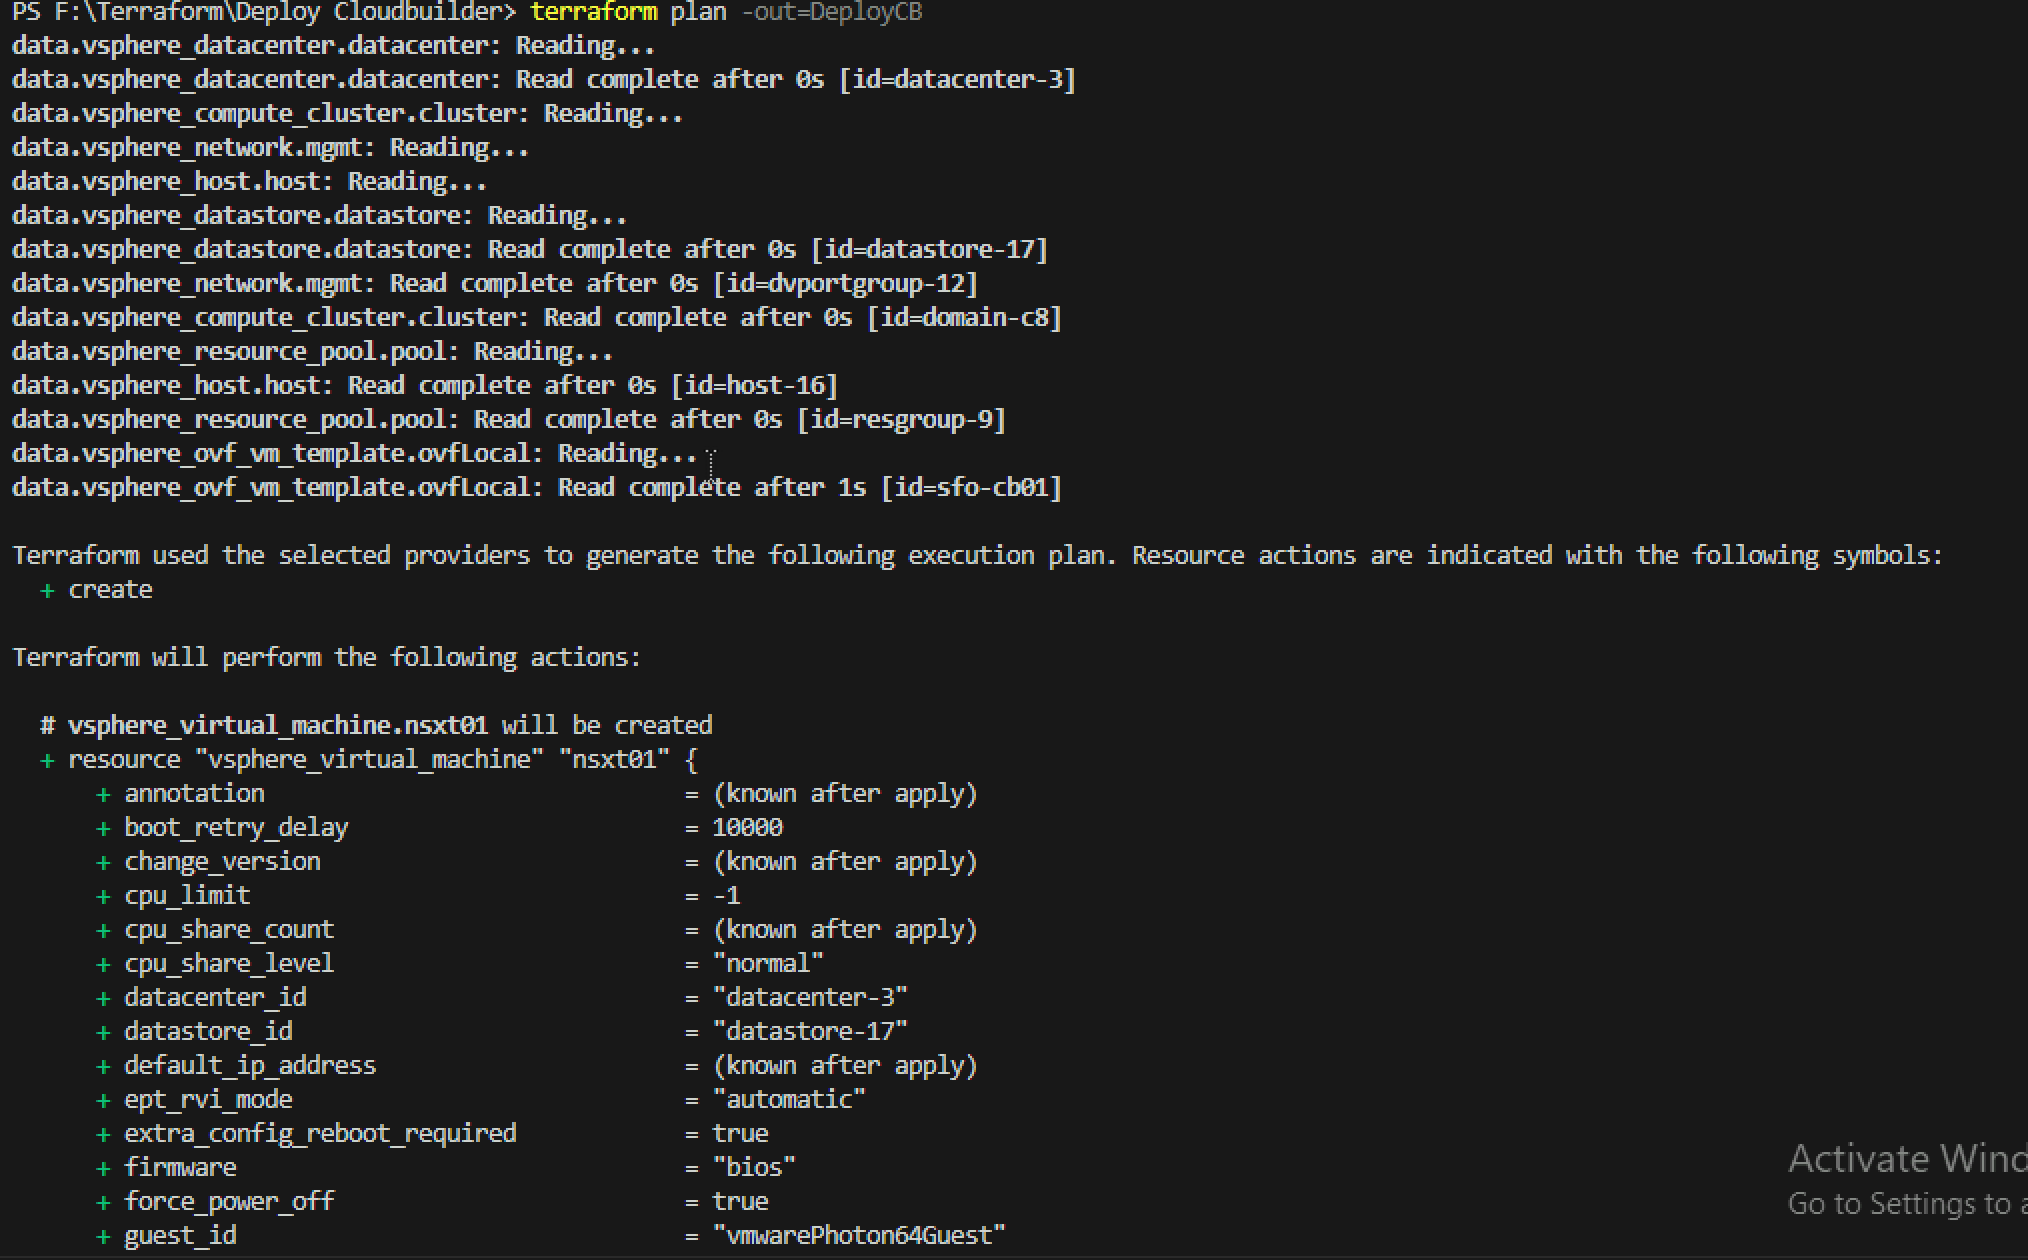
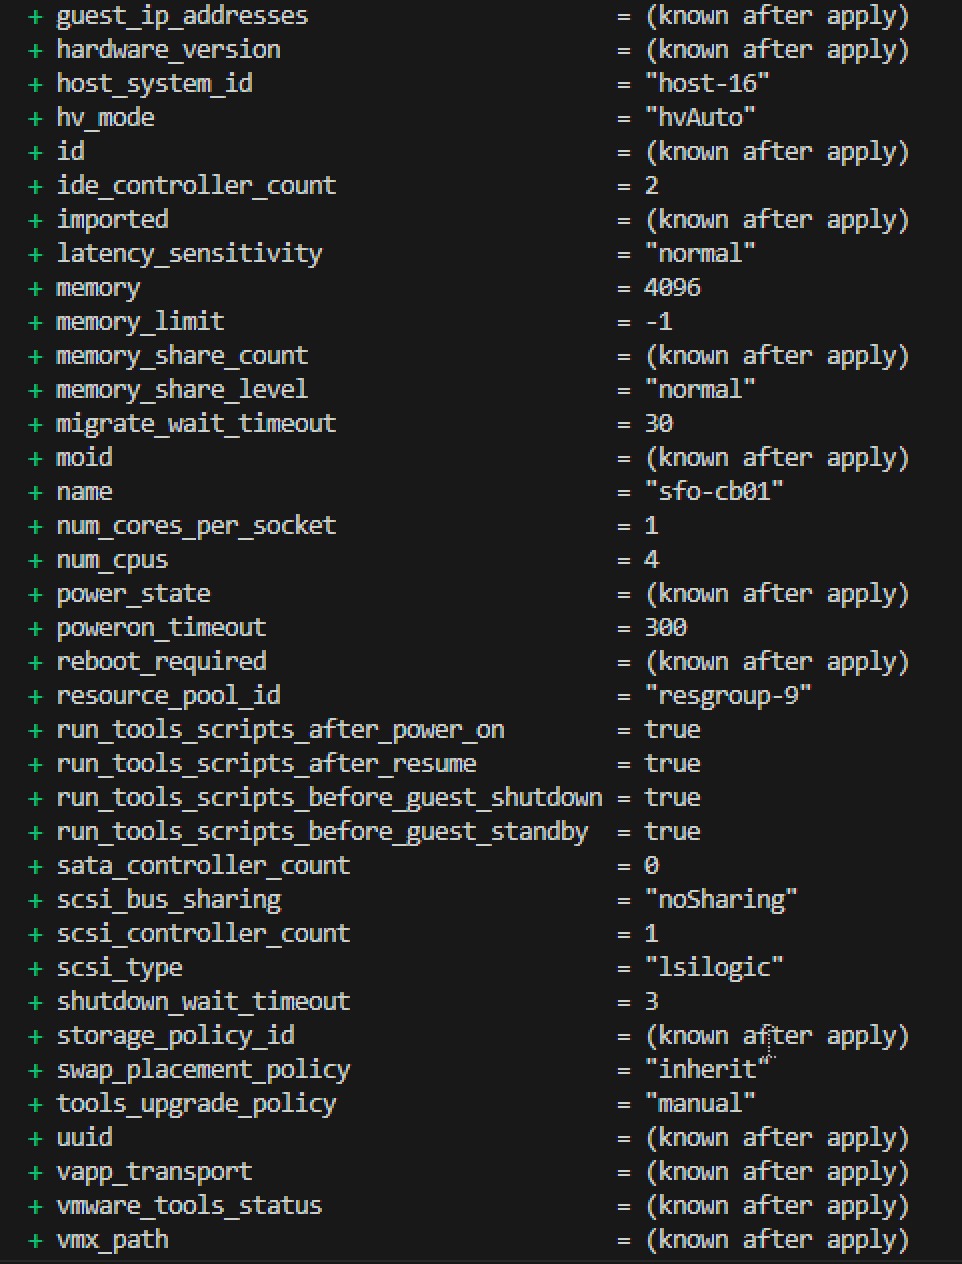
One the provider is initialised, we can then create a terraform plan to ensure our configuration is valid.
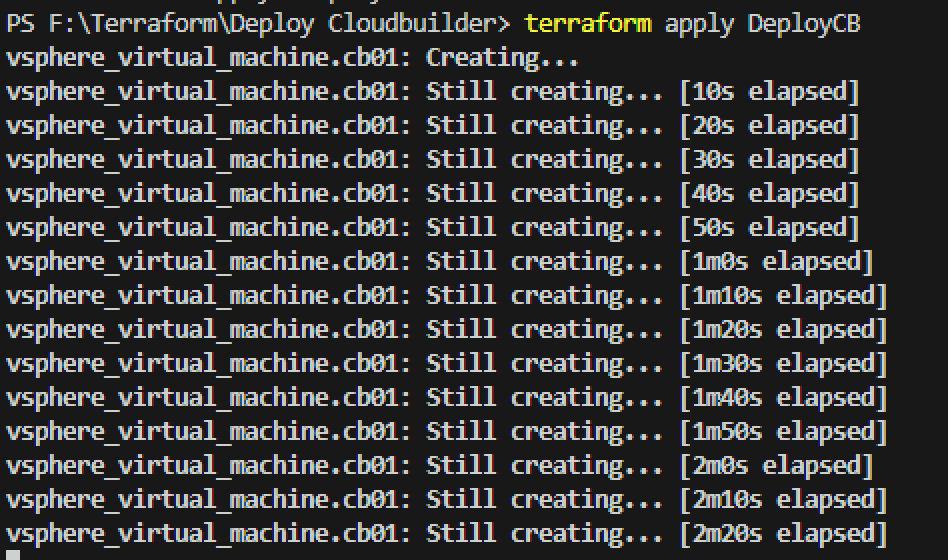
terraform plan -out=DeployCB
Now that we have a valid configuration we can apply our plan to deploy the Cloud Builder appliance.
Following on from my VMware Cloud Foundation Terraform Provider introduction post here I wanted to start by using it to create a new VCF instance (or perform a VCF bring-up).
As of writing this post I am using version 0.5.0 of the provider.
First off we need to define some variables to be used in our plan. Here is a copy of the variables.tf I am using. For reference, I am using the default values in the VCF Planning & Preparation Workbook for my configuration. Note “sensitive = true” on password and licence key variable to stop them from showing up on the console and in logs.
variable "cloud_builder_username" {
  description = "Username to authenticate to CloudBuilder"
  default = "admin"
}

variable "cloud_builder_password" {
  description = "Password to authenticate to CloudBuilder"
  default = "VMw@re1!"
  sensitive = true
}

variable "cloud_builder_host" {
  description = "Fully qualified domain name or IP address of the CloudBuilder"
  default = "sfo-cb01.sfo.rainpole.io"
}

variable "sddc_manager_root_user_password" {
  description = "Root user password for the SDDC Manager VM. Password needs to be a strong password with at least one alphabet and one special character and at least 8 characters in length"
  default = "VMw@re1!"
  sensitive = true
}

variable "sddc_manager_secondary_user_password" {
  description = "Second user (vcf) password for the SDDC Manager VM.  Password needs to be a strong password with at least one alphabet and one special character and at least 8 characters in length."
  default = "VMw@re1!"
  sensitive = true
}

variable "vcenter_root_password" {
  description = "root password for the vCenter Server Appliance (8-20 characters)"
  default = "VMw@re1!"
  sensitive = true
}

variable "nsx_manager_admin_password" {
  description = "NSX admin password. The password must be at least 12 characters long. Must contain at-least 1 uppercase, 1 lowercase, 1 special character and 1 digit. In addition, a character cannot be repeated 3 or more times consecutively."
  default = "VMw@re1!VMw@re1!"
  sensitive = true
}

variable "nsx_manager_audit_password" {
  description = "NSX audit password. The password must be at least 12 characters long. Must contain at-least 1 uppercase, 1 lowercase, 1 special character and 1 digit. In addition, a character cannot be repeated 3 or more times consecutively."
  default = "VMw@re1!VMw@re1!"
  sensitive = true
}

variable "nsx_manager_root_password" {
  description = " NSX Manager root password. Password should have 1) At least eight characters, 2) At least one lower-case letter, 3) At least one upper-case letter 4) At least one digit 5) At least one special character, 6) At least five different characters , 7) No dictionary words, 6) No palindromes"
  default = "VMw@re1!VMw@re1!"
  sensitive = true
}

variable "esx_host1_pass" {
  description = "Password to authenticate to the ESXi host 1"
  default = "VMw@re1!"
  sensitive = true
}

variable "esx_host2_pass" {
  description = "Password to authenticate to the ESXi host 2"
  default = "VMw@re1!"
  sensitive = true
}

variable "esx_host3_pass" {
  description = "Password to authenticate to the ESXi host 3"
  default = "VMw@re1!"
  sensitive = true
}

variable "esx_host4_pass" {
  description = "Password to authenticate to the ESXi host 4"
  default = "VMw@re1!"
  sensitive = true
}

variable "nsx_license_key" {
  description = "NSX license to be used"
  default = "AAAAA-BBBBB-CCCCC-DDDDD-EEEE"
  sensitive = true
}

variable "vcenter_license_key" {
  description = "vCenter license to be used"
  default = "AAAAA-BBBBB-CCCCC-DDDDD-EEEE"
  sensitive = true
}

variable "vsan_license_key" {
  description = "vSAN license key to be used"
  default = "AAAAA-BBBBB-CCCCC-DDDDD-EEEE"
  sensitive = true
}

variable "esx_license_key" {
  description = "ESXi license key to be used"
  default = "AAAAA-BBBBB-CCCCC-DDDDD-EEEE"
  sensitive = true
}
Next, we need our main.tf file that contains what we want to do – in this case – perform a VCF bring-up. For now, I’m using a mix of variables from the above variables.tf file and hard-coded values in my main.tf to achieve my goal. I will follow up with some better practices in a later post.
HashiCorp Terraform has become an industry standard, infrastructure-as-code & desired-state configuration tool for managing on-premises and cloud-based entities. If you are not familiar with Terraform, I’ve covered some early general learnings on Terraform in some posts here & here. The internal engineering team are working on a Terraform provider for VCF, so I decided to give it a spin to review its capabilities & test drive it in the lab.
First off what VCF operations is the Provider capable of supporting today:
Deploying a new VCF instance (bring-up)
Commissioning hosts
Creating network pools
Deploying a new VI Workload domain
Creating clusters
Expanding clusters
Adding users
New functionality is being added every week, and as with all new initiatives like this, customer consumption and adoption will drive innovation and progress.
The GitHub repo contains some great example files to get you started. I am going to do a few blog posts on what I’ve learned so far but for now, here are the important links you need if you would like to take a look at the provider
Once i got my head around the basics of Terraform I wanted to play with the vSphere provider to see what its was capable of. A basic use case that everyone needs is to deploy a VM. So my first use case is to deploy a VM from an OVA. The vSphere provider documentation for deploying an OVA uses William Lam’s nested ESXi OVA as an example. This is a great example of how to use the provider but seeing as I plan to play with the NSX-T provider also, I decided to use NSX-T Manager OVA as my source to deploy.
So first thing to do is setup your provider. Every provider in the Terraform registry has a Use Provider button on the provider page that pops up a How to use this provider box. This shows you what you need to put in your required_providers & provider block. In my case I will use a providers.tf file and it will look like the below example. Note you can only have one required_providers block in your configuration, but you can have multiple providers. So all required providers go in the same required_providers block and each provider has its own provider block.
To authenticate to our chosen provider (in this case vSphere) we need to provide credentials. If you read my initial post on Terraform you would have seen me mention a terraform.tfvars file which can be used for sensitive variables. We will declare these as variables later in the variables.tf file but this is where we assign the values. So my terraform.tfvars file looks like this
Next we need variables to enable us to deploy our NSX-T Manager appliance. So we create a variables.tf file and populate it with our variables. Note – variables that have a default value are considered optional and the default value will be used if no value is passed.
Now that we have our provider & variables in place we need a plan file to deploy the NSX-T Manager OVA, including the data sources we need to pull information from and the resource we are going to create.
<br />
# main.tf</p>
<p># Data source for vCenter Datacenter<br />
data "vsphere_datacenter" "datacenter" {<br />
  name = var.data_center<br />
}</p>
<p># Data source for vCenter Cluster<br />
data "vsphere_compute_cluster" "cluster" {<br />
  name          = var.cluster<br />
  datacenter_id = data.vsphere_datacenter.datacenter.id<br />
}</p>
<p># Data source for vCenter Datastore<br />
data "vsphere_datastore" "datastore" {<br />
  name          = var.workload_datastore<br />
  datacenter_id = data.vsphere_datacenter.datacenter.id<br />
}</p>
<p># Data source for vCenter Portgroup<br />
data "vsphere_network" "mgmt" {<br />
  name          = var.mgmt_pg<br />
  datacenter_id = data.vsphere_datacenter.datacenter.id<br />
}</p>
<p># Data source for vCenter Resource Pool. In our case we will use the root resource pool<br />
data "vsphere_resource_pool" "pool" {<br />
  name          = format("%s%s", data.vsphere_compute_cluster.cluster.name, "/Resources")<br />
  datacenter_id = data.vsphere_datacenter.datacenter.id<br />
}</p>
<p># Data source for ESXi host to deploy to<br />
data "vsphere_host" "host" {<br />
  name          = var.compute_host<br />
  datacenter_id = data.vsphere_datacenter.datacenter.id<br />
}</p>
<p># Data source for the OVF to read the required OVF Properties<br />
data "vsphere_ovf_vm_template" "ovfLocal" {<br />
  name             = var.vm_name<br />
  resource_pool_id = data.vsphere_resource_pool.pool.id<br />
  datastore_id     = data.vsphere_datastore.datastore.id<br />
  host_system_id   = data.vsphere_host.host.id<br />
  local_ovf_path   = var.local_ovf_path<br />
  ovf_network_map = {<br />
    "Network 1" = data.vsphere_network.mgmt.id<br />
  }<br />
}</p>
<p># Deployment of VM from Local OVA<br />
resource "vsphere_virtual_machine" "nsxt01" {<br />
  name                 = var.vm_name<br />
  datacenter_id        = data.vsphere_datacenter.datacenter.id<br />
  datastore_id         = data.vsphere_ovf_vm_template.ovfLocal.datastore_id<br />
  host_system_id       = data.vsphere_ovf_vm_template.ovfLocal.host_system_id<br />
  resource_pool_id     = data.vsphere_ovf_vm_template.ovfLocal.resource_pool_id<br />
  num_cpus             = data.vsphere_ovf_vm_template.ovfLocal.num_cpus<br />
  num_cores_per_socket = data.vsphere_ovf_vm_template.ovfLocal.num_cores_per_socket<br />
  memory               = data.vsphere_ovf_vm_template.ovfLocal.memory<br />
  guest_id             = data.vsphere_ovf_vm_template.ovfLocal.guest_id<br />
  scsi_type            = data.vsphere_ovf_vm_template.ovfLocal.scsi_type<br />
  dynamic "network_interface" {<br />
    for_each = data.vsphere_ovf_vm_template.ovfLocal.ovf_network_map<br />
    content {<br />
      network_id = network_interface.value<br />
    }<br />
  }</p>
<p>  wait_for_guest_net_timeout = 5</p>
<p>  ovf_deploy {<br />
    allow_unverified_ssl_cert = true<br />
    local_ovf_path            = var.local_ovf_path<br />
    disk_provisioning         = "thin"<br />
    deployment_option         = var.deployment_option</p>
<p>  }<br />
  vapp {<br />
    properties = {<br />
      "nsx_role"               = var.nsx_role,<br />
      "nsx_ip_0"               = var.nsx_ip_0,<br />
      "nsx_netmask_0"          = var.nsx_netmask_0,<br />
      "nsx_gateway_0"          = var.nsx_gateway_0,<br />
      "nsx_dns1_0"             = var.nsx_dns1_0,<br />
      "nsx_domain_0"           = var.nsx_domain_0,<br />
      "nsx_ntp_0"              = var.nsx_ntp_0,<br />
      "nsx_isSSHEnabled"       = var.nsx_isSSHEnabled,<br />
      "nsx_allowSSHRootLogin"  = var.nsx_allowSSHRootLogin,<br />
      "nsx_passwd_0"           = var.nsx_passwd_0,<br />
      "nsx_cli_passwd_0"       = var.nsx_cli_passwd_0,<br />
      "nsx_cli_audit_passwd_0" = var.nsx_cli_audit_passwd_0,<br />
      "nsx_hostname"           = var.nsx_hostname<br />
    }<br />
  }<br />
  lifecycle {<br />
    ignore_changes = [<br />
      #vapp # Enable this to ignore all vapp properties if the plan is re-run<br />
      vapp[0].properties["nsx_role"], # Avoid unwanted changes to specific vApp properties.<br />
      vapp[0].properties["nsx_passwd_0"],<br />
      vapp[0].properties["nsx_cli_passwd_0"],<br />
      vapp[0].properties["nsx_cli_audit_passwd_0"],<br />
      host_system_id # Avoids moving the VM back to the host it was deployed to if DRS has relocated it<br />
    ]<br />
  }<br />
}<br />
Once we have all of the above we can run the following to validate our plan
terraform plan -out=nsxt01
If your plan is successful you should see an output similar to below
Once your plan is successful run the command below to apply the plan
terraform apply nsxt01
If the stars align your NSX-T Manager appliance should deploy successfully. Once its deployed, if you were to re-run the plan you should see a message similar to below
One of the key pieces to this is the lifecycle block in the plan. The lifecycle block enables you to callout things that Terraform should ignore when it is re-applying a plan. Things like tags or other items that may get updated by other systems etc. In our case we want Terraform to ignore the vApp properties as it will try to apply password properties every time, which would entail powering down the VM, making the change, and powering the VM back on.
Playing with Terraform has been on my To-Do list for a while now (it’s a long list 🙂 ). Over the past couple of weeks i’ve been spending time in my homelab getting familiar with it and figured i’d create a blog series that may help others.
So where do you start? There are lots of resources on the web to get started. From blogs to Pluralsight courses. The Terraform documentation & provider documentation in the Terraform Registry is also very good and usually has what you need.
For my setup i use Visual Studio Code. I flip between my mac & a windows jump vm in my homelab, and VSC works seamlessly on both. I’ve installed the following VSC extension:
Read alphabetically and actioned when you plan/apply/destroy your config (more on that later)
A single main.tf file can contain everything your infrastructure plan requires:
Provider
Variables
Data Sources
Resources
Recommended to split these out for larger environments
providers.tf
You must declare required_providers and then a provider block for each provider.
You can use alias = “alias_name” if you want to have multiple instances of a provider.
In the screenshot below the credentials are coming from variables defined in my terraform.tfvars file
variables.tf
List of variables to be used in the configuration
Written in Hashicorp Configuration Language (HCL) (or JSON)
Sensitive variables such as credentials or access keys should be stored in Terraform variable definition files .tfvars or stored as environment variables.
Use a Terraform.gitignore file to ensure your .tfvars with sensitive information are not committed to your git repo.
Data Sources & Resources can be in a single file or split out into logical infrastructure files
network.tf
deploy_vm.tf
etc
Terraform Commands
Once you have your configuration defined you first want to validate that it will run
terraform plan -out=plan-name
# This will evaluate your configuration to ensure it is valid and store the result in a file called "plan-name"
terraform apply plan-name
# This will apply your configuration based on the output of the above plan. You will be asked to confirm this action. you can add -auto-approve to skip the confirmation (use with caution)
terraform destroy
# This will destroy the configuration. You will be asked to confirm this action. you can add -auto-approve to skip the confirmation (use with caution)
Hopefully this was helpful. This is just scratching the surface to get started with Terraform. I recommend getting hands on and reading the documentation as you go. I will continue this with a post on using the vSphere provider to deploy an OVA. Stay tuned!