Following on from my VMware Cloud Foundation Terraform Provider introduction post here I wanted to start by using it to create a new VCF instance (or perform a VCF bring-up).
As of writing this post I am using version 0.5.0 of the provider.
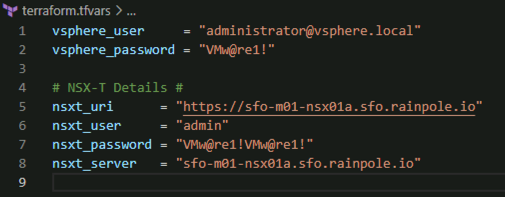
First off we need to define some variables to be used in our plan. Here is a copy of the variables.tf I am using. For reference, I am using the default values in the VCF Planning & Preparation Workbook for my configuration. Note “sensitive = true” on password and licence key variable to stop them from showing up on the console and in logs.
variable "cloud_builder_username" {
description = "Username to authenticate to CloudBuilder"
default = "admin"
}
variable "cloud_builder_password" {
description = "Password to authenticate to CloudBuilder"
default = "VMw@re1!"
sensitive = true
}
variable "cloud_builder_host" {
description = "Fully qualified domain name or IP address of the CloudBuilder"
default = "sfo-cb01.sfo.rainpole.io"
}
variable "sddc_manager_root_user_password" {
description = "Root user password for the SDDC Manager VM. Password needs to be a strong password with at least one alphabet and one special character and at least 8 characters in length"
default = "VMw@re1!"
sensitive = true
}
variable "sddc_manager_secondary_user_password" {
description = "Second user (vcf) password for the SDDC Manager VM. Password needs to be a strong password with at least one alphabet and one special character and at least 8 characters in length."
default = "VMw@re1!"
sensitive = true
}
variable "vcenter_root_password" {
description = "root password for the vCenter Server Appliance (8-20 characters)"
default = "VMw@re1!"
sensitive = true
}
variable "nsx_manager_admin_password" {
description = "NSX admin password. The password must be at least 12 characters long. Must contain at-least 1 uppercase, 1 lowercase, 1 special character and 1 digit. In addition, a character cannot be repeated 3 or more times consecutively."
default = "VMw@re1!VMw@re1!"
sensitive = true
}
variable "nsx_manager_audit_password" {
description = "NSX audit password. The password must be at least 12 characters long. Must contain at-least 1 uppercase, 1 lowercase, 1 special character and 1 digit. In addition, a character cannot be repeated 3 or more times consecutively."
default = "VMw@re1!VMw@re1!"
sensitive = true
}
variable "nsx_manager_root_password" {
description = " NSX Manager root password. Password should have 1) At least eight characters, 2) At least one lower-case letter, 3) At least one upper-case letter 4) At least one digit 5) At least one special character, 6) At least five different characters , 7) No dictionary words, 6) No palindromes"
default = "VMw@re1!VMw@re1!"
sensitive = true
}
variable "esx_host1_pass" {
description = "Password to authenticate to the ESXi host 1"
default = "VMw@re1!"
sensitive = true
}
variable "esx_host2_pass" {
description = "Password to authenticate to the ESXi host 2"
default = "VMw@re1!"
sensitive = true
}
variable "esx_host3_pass" {
description = "Password to authenticate to the ESXi host 3"
default = "VMw@re1!"
sensitive = true
}
variable "esx_host4_pass" {
description = "Password to authenticate to the ESXi host 4"
default = "VMw@re1!"
sensitive = true
}
variable "nsx_license_key" {
description = "NSX license to be used"
default = "AAAAA-BBBBB-CCCCC-DDDDD-EEEE"
sensitive = true
}
variable "vcenter_license_key" {
description = "vCenter license to be used"
default = "AAAAA-BBBBB-CCCCC-DDDDD-EEEE"
sensitive = true
}
variable "vsan_license_key" {
description = "vSAN license key to be used"
default = "AAAAA-BBBBB-CCCCC-DDDDD-EEEE"
sensitive = true
}
variable "esx_license_key" {
description = "ESXi license key to be used"
default = "AAAAA-BBBBB-CCCCC-DDDDD-EEEE"
sensitive = true
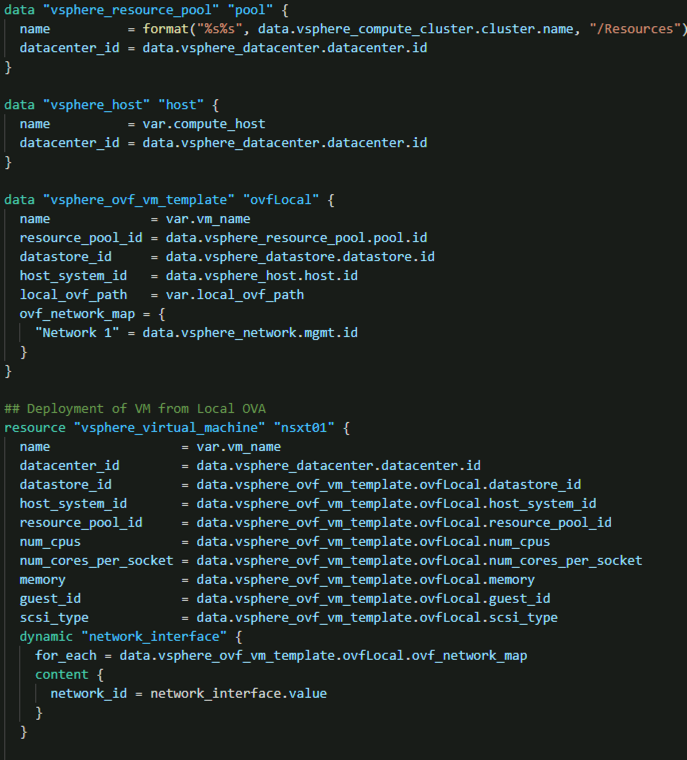
}Next, we need our main.tf file that contains what we want to do – in this case – perform a VCF bring-up. For now, I’m using a mix of variables from the above variables.tf file and hard-coded values in my main.tf to achieve my goal. I will follow up with some better practices in a later post.
terraform {
  required_providers {
    vcf = {
      source = "vmware/vcf"
    }
  }
}
provider "vcf" {
  cloud_builder_host = var.cloud_builder_host
  cloud_builder_username = var.cloud_builder_username
  cloud_builder_password = var.cloud_builder_password
  allow_unverified_tls = true
}

resource "vcf_instance" "sddc_1" {
  instance_id = "sfo-m01"
  dv_switch_version = "7.0.3"
  skip_esx_thumbprint_validation = true
  management_pool_name = "sfo-m01-np"
  ceip_enabled = false
  esx_license = var.esx_license_key
  task_name = "workflowconfig/workflowspec-ems.json"
  sddc_manager {
    ip_address = "172.16.11.59"
    hostname = "sfo-vcf01"
    root_user_credentials {
      username = "root"
      password = var.sddc_manager_root_user_password
    }
    second_user_credentials {
      username = "vcf"
      password = var.sddc_manager_secondary_user_password
    }
  }
  ntp_servers = [
    "172.16.11.4"
  ]
  dns {
    domain = "sfo.rainpole.io"
    name_server = "172.16.11.4"
    secondary_name_server = "172.16.11.5"
  }
  network {
    subnet = "172.16.11.0/24"
    vlan_id = "1611"
    mtu = "1500"
    network_type = "MANAGEMENT"
    gateway = "172.16.11.1"
  }
  network {
    subnet = "172.16.13.0/24"
    include_ip_address_ranges {
      start_ip_address = "172.16.13.101"
      end_ip_address = "172.16.13.108"
    }
    vlan_id = "1613"
    mtu = "8900"
    network_type = "VSAN"
    gateway = "172.16.13.1"
  }
  network {
    subnet = "172.16.12.0/24"
    include_ip_address_ranges {
      start_ip_address = "172.16.12.101"
      end_ip_address = "172.16.12.104"
    }
    vlan_id = "1612"
    mtu = "8900"
    network_type = "VMOTION"
    gateway = "172.16.12.1"
  }
  nsx {
    nsx_manager_size = "medium"
    nsx_manager {
      hostname = "sfo-m01-nsx01a"
      ip = "172.16.11.72"
    }
    root_nsx_manager_password = var.nsx_manager_root_password
    nsx_admin_password = var.nsx_manager_admin_password
    nsx_audit_password = var.nsx_manager_audit_password
    overlay_transport_zone {
      zone_name = "sfo-m01-overlay-tz"
      network_name = "sfo-m01-overlay"
    }
    vip = "172.16.11.71"
    vip_fqdn = "sfo-m01-nsx01"
    license = var.nsx_license_key
    transport_vlan_id = 1614
  }
  vsan {
    license = var.vsan_license_key
    datastore_name = "sfo-m01-vsan"
  }
  dvs {
    mtu = 8900
    nioc {
      traffic_type = "VSAN"
      value = "HIGH"
    }
    nioc {
      traffic_type = "VMOTION"
      value = "LOW"
    }
    nioc {
      traffic_type = "VDP"
      value = "LOW"
    }
    nioc {
      traffic_type = "VIRTUALMACHINE"
      value = "HIGH"
    }
    nioc {
      traffic_type = "MANAGEMENT"
      value = "NORMAL"
    }
    nioc {
      traffic_type = "NFS"
      value = "LOW"
    }
    nioc {
      traffic_type = "HBR"
      value = "LOW"
    }
    nioc {
      traffic_type = "FAULTTOLERANCE"
      value = "LOW"
    }
    nioc {
      traffic_type = "ISCSI"
      value = "LOW"
    }
    dvs_name = "SDDC-Dswitch-Private"
    vmnics = [
      "vmnic0",
      "vmnic1"
    ]
    networks = [
      "MANAGEMENT",
      "VSAN",
      "VMOTION"
    ]
  }
  cluster {
    cluster_name = "sfo-m01-cl01"
    cluster_evc_mode = ""
    resource_pool {
      name = "Mgmt-ResourcePool"
      type = "management"
    }
    resource_pool {
      name = "Network-ResourcePool"
      type = "network"
    }
    resource_pool {
      name = "Compute-ResourcePool"
      type = "compute"
    }
    resource_pool {
      name = "User-RP"
      type = "compute"
    }
  }
  psc {
    psc_sso_domain = "vsphere.local"
    admin_user_sso_password = "VMw@re1!"
  }
  vcenter {
    vcenter_ip = "172.16.11.70"
    vcenter_hostname = "sfo-m01-vc01"
    license = var.vcenter_license_key
    root_vcenter_password = var.vcenter_root_password
    vm_size = "tiny"
  }
  host {
    credentials {
      username = "root"
      password = "VMw@re1!"
    }
    ip_address_private {
      subnet = "255.255.255.0"
      cidr = ""
      ip_address = "172.16.11.101"
      gateway = "172.16.11.1"
    }
    hostname = "sfo01-m01-esx01"
    vswitch = "vSwitch0"
    association = "SDDC-Datacenter"
  }
  host {
    credentials {
      username = "root"
      password = "VMw@re1!"
    }
    ip_address_private {
      subnet = "255.255.255.0"
      cidr = ""
      ip_address = "172.16.11.102"
      gateway = "172.16.11.1"
    }
    hostname = "sfo01-m01-esx02"
    vswitch = "vSwitch0"
    association = "SDDC-Datacenter"
  }
  host {
    credentials {
      username = "root"
      password = "VMw@re1!"
    }
    ip_address_private {
      subnet = "255.255.255.0"
      cidr = ""
      ip_address = "172.16.11.103"
      gateway = "172.16.11.1"
    }
    hostname = "sfo01-m01-esx03"
    vswitch = "vSwitch0"
    association = "SDDC-Datacenter"
  }
  host {
    credentials {
      username = "root"
      password = "VMw@re1!"
    }
    ip_address_private {
      subnet = "255.255.255.0"
      cidr = ""
      ip_address = "172.16.11.104"
      gateway = "172.16.11.1"
    }
    hostname = "sfo01-m01-esx04"
    vswitch = "vSwitch0"
    association = "SDDC-Datacenter"
  }
}
Once the above is defined you can run the following to create your Terraform Plan:
terraform init
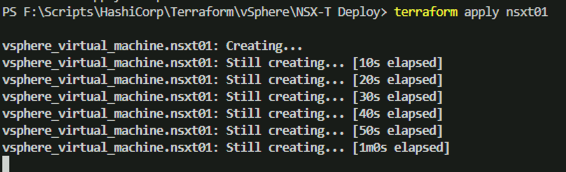
terraform plan -out=vcf-bringupOnce there are no errors from the above plan command you can run the following to start the VCF bring-up
terraform apply .\vcf-bringupAll going well, this should result in a successful VMware Cloud Foundation bring-up